Why the same filter looks different on every photo
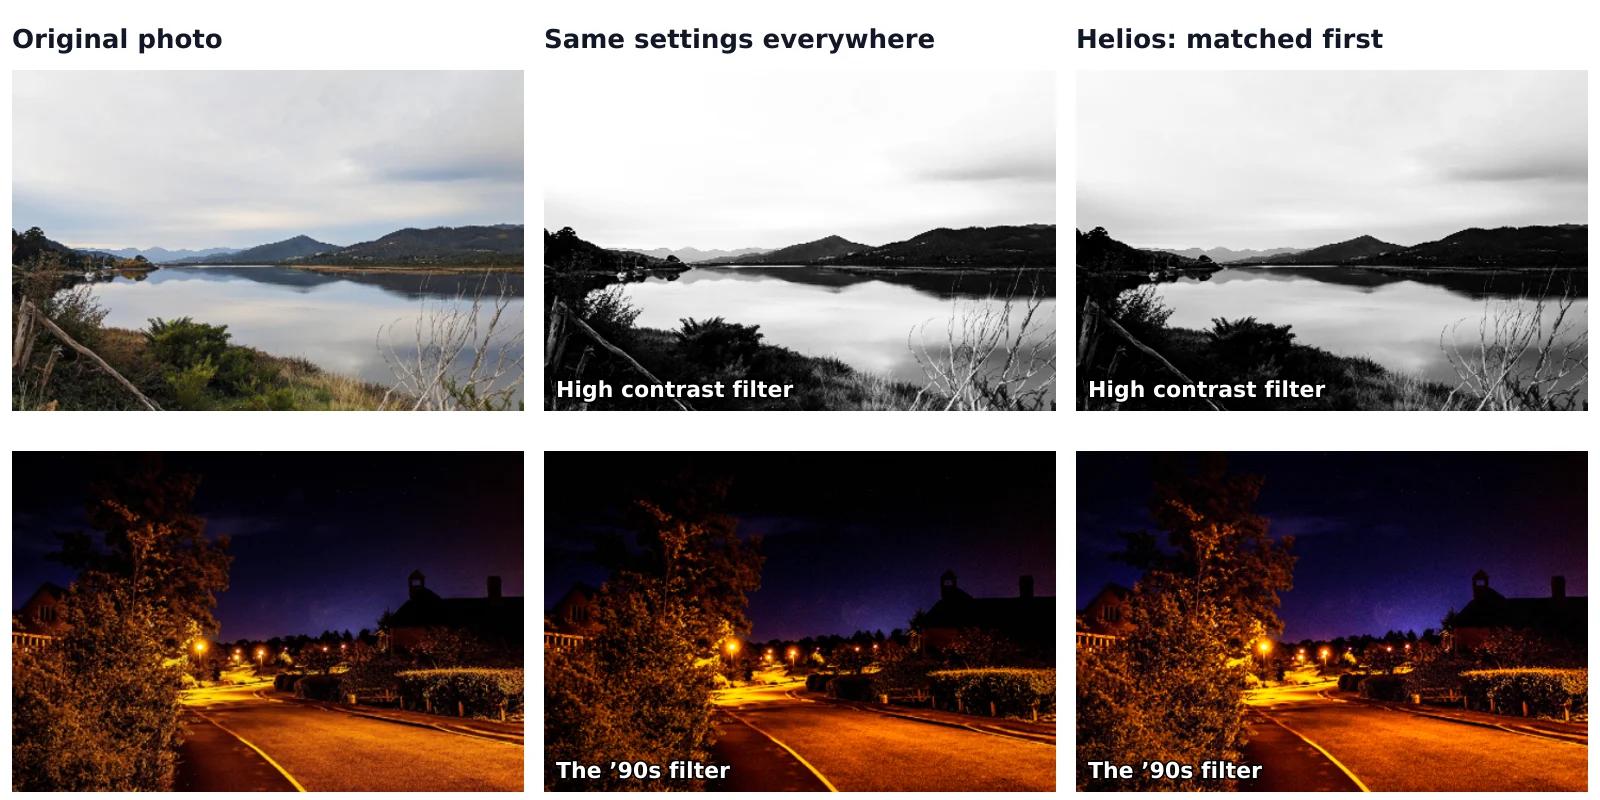
You apply a filter that looked great in the sample, and on your own photo the sky turns white or the shadows go black. The filter isn’t broken. It changes your photo by the same amount, starting from wherever that photo already is, and every photo starts somewhere else. We measured all 100 filters of our editor on 7 very different photos to see how big that difference is and what a filter can do about it.
Why does a filter look different on your photo?
Most filters and presets are a list of slider changes: a little more exposure, more contrast, warmer colours, less saturation in the greens. The program applies that list to your photo as it is. If the photo used for the sample was a balanced daylight shot and yours was taken at dusk, the same +20 contrast starts from a much darker point and ends somewhere else.
Two things decide most of the difference. The first is brightness: how light or dark the photo is before the filter. The second is white balance, the colour of the light the photo was taken in. A photo taken under ordinary light bulbs comes out yellowish orange, and one taken in the shade on a sunny day comes out blue (Wikipedia). A warm filter on an already orange photo pushes it further towards orange, while on a bluish photo it only neutralises the blue.
How different are photos before you apply a filter?
Very. For our test we chose 7 photos from Wikimedia Commons, all released into the public domain: a lake on an overcast day, a garden in strong sun, a street at night under sodium lamps, ferns in the shade, wood samples in skin tones, dunes in full sun and a sunset with the sun blown out. We measured their brightness on the L* scale of the CIELAB colour space, which runs from 0 for black to 100 for white (Wikipedia). The median brightness of the night street was 6, the ferns in the shade 28, the garden in the sun 50 and the overcast lake 77.
A filter that adds the same amount of contrast to all of them has a very different job on each. On the lake, the bright sky is already close to white, so more contrast pushes it over the edge. On the night street, most of the photo is already close to black, so more contrast turns large parts of it black.
What did we measure on 100 filters and 7 photos?
| Result | Same settings on every photo | Matched to the photo first |
|---|---|---|
| Pairs with more than 1% of the photo blown out to white | 36 | 7 |
| Pairs with more than 5% of the photo crushed to black | 57 | 24 |
| High contrast filter on the overcast lake: share blown out to white | 35.8% | 0.1% |
| The ’90s filter on the night street: share crushed to black | 25.5% | 4.3% |
| Spread of median brightness across the 7 photos (standard deviation, L*) | 23.5 | 21.4 |
What does matching the photo first change?
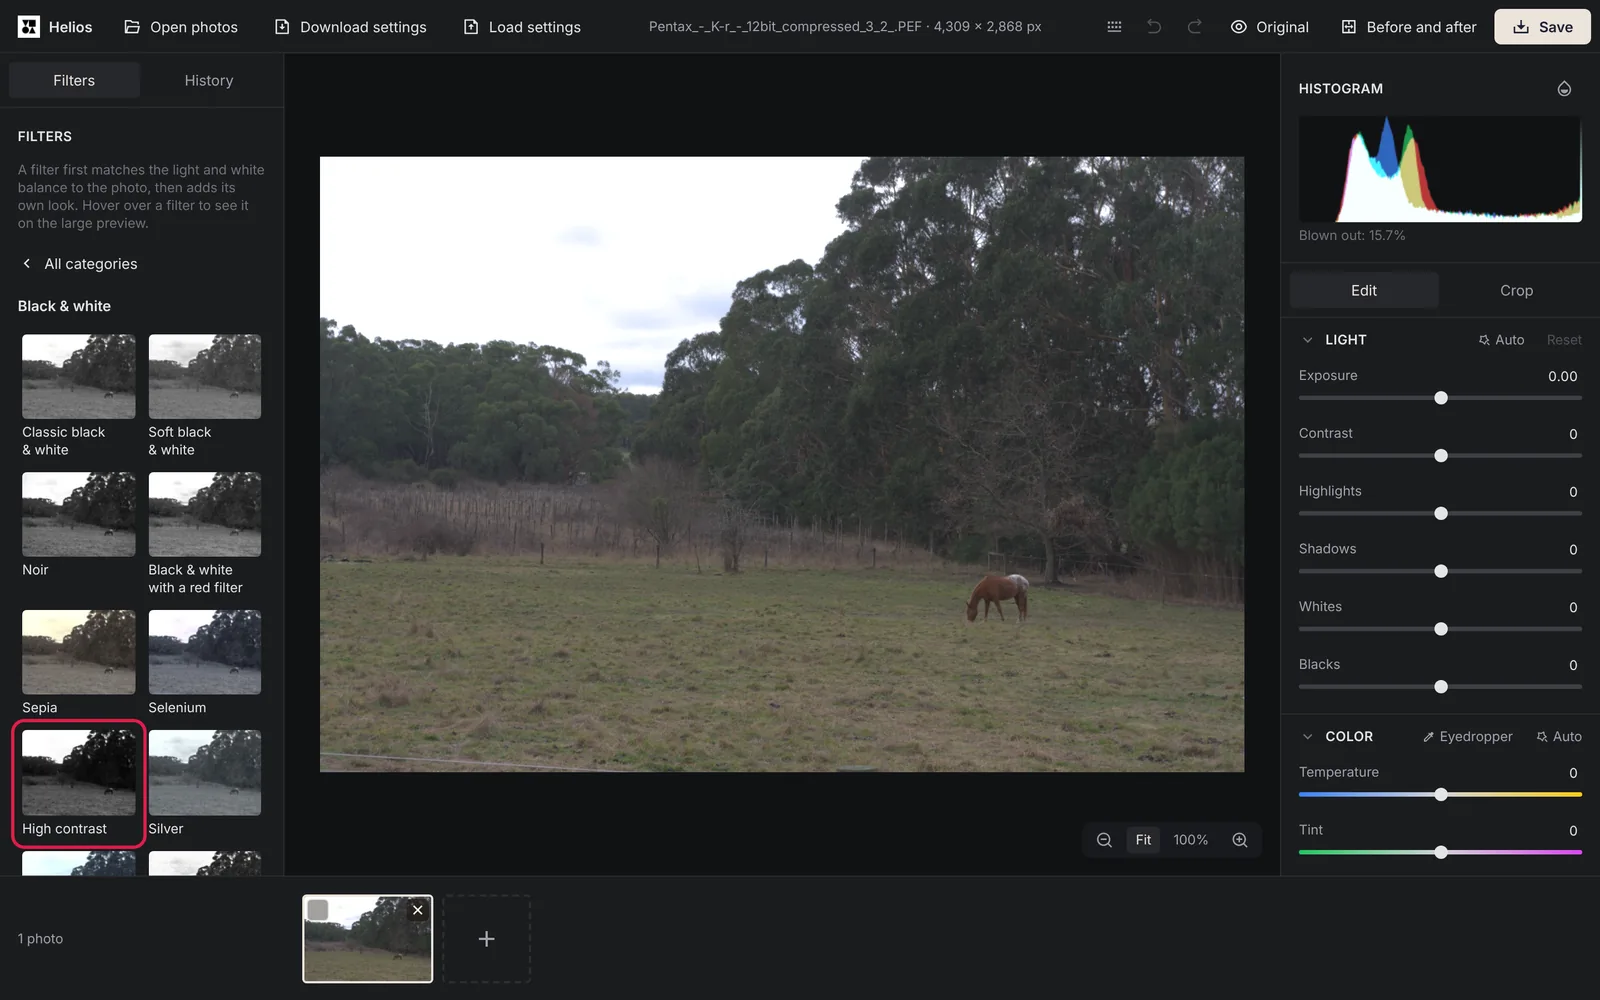
In Helios, our free photo editor, a filter doesn’t start from the photo as it is. It first sets the light and white balance the same way as the Auto buttons in the Light and Color sections, and then adds its own look. If the result would still blow out part of the photo, the editor moves the Whites slider to the left, and the Exposure slider too if needed, only as far as necessary.
The table shows what that does. Blown-out white areas appeared in 7 pairs instead of 36, and large black areas in 24 instead of 57. The photos don’t end up looking alike, and they shouldn’t: the brightness of the 7 photos was almost as spread out after matching as before, so the night street stays a night street and the sunny dunes stay bright. What matching removes is the failure where the filter destroys the detail in the sky or in the shadows.
It doesn’t remove everything. The High contrast filter still leaves 57.9% of the night street completely black, because there is almost no light in that photo to begin with. The sunset already had its sun blown out in the original, and no filter can bring back detail that was never recorded.
How do you make a filter work on your photo?
These steps work with filters and presets in any editor; the button names are the ones in Helios.
1. Fix the light and colour first
Brighten a dark photo and correct a colour cast before you add a filter. In Helios, a filter does this by itself, and in other programs click their automatic adjustment first.2. Judge the filter on your own photo
Don’t choose by the sample image. In Helios, hovering over a filter shows it on the large preview before anything changes.3. Lower the strength
A strong filter rarely suits every photo at full strength. Move Filter strength to 50–70% and compare with Before and after (Y key).4. Check the bright and dark areas
Press J for Show clipping: red marks areas blown out to white and blue marks areas crushed to black. Bring them back with Highlights, Whites, Shadows or Blacks.
Why do your own filters work better on other photos?
When you save your own look in Helios with Save the current look as a filter, the editor doesn’t store the slider positions as they are. It stores how far your settings are from the editor’s automatic adjustment of that photo. On the next photo, the filter starts from that photo’s own automatic adjustment and adds the same difference, so a look you made on a bright beach photo also fits a dimmer one from the same trip.
Sources
- Color temperature, Wikipedia
- CIELAB color space, Wikipedia
Frequently asked questions about filters
Is a preset the same as a filter?
Mostly, yes. Both are a saved set of edits that you apply with one click. Some programs call them presets and others filters, and both run into the same problem with photos that start very bright or very dark.
Why do presets look different on RAW files and JPG files?
A RAW file starts flatter and holds more detail in the bright and dark areas, while a JPG has already been processed by the camera or phone. The same changes start from a different point, so the result differs too.
How did you measure blown-out and black areas?
On each result scaled to 320 pixels, we counted the pixels with all three colours at 250 or more out of 255 as blown out, and those with all three at 5 or less as black.
More guides
 6 min read
Can you fix an overexposed photo? What RAW gets back and JPG doesn’t
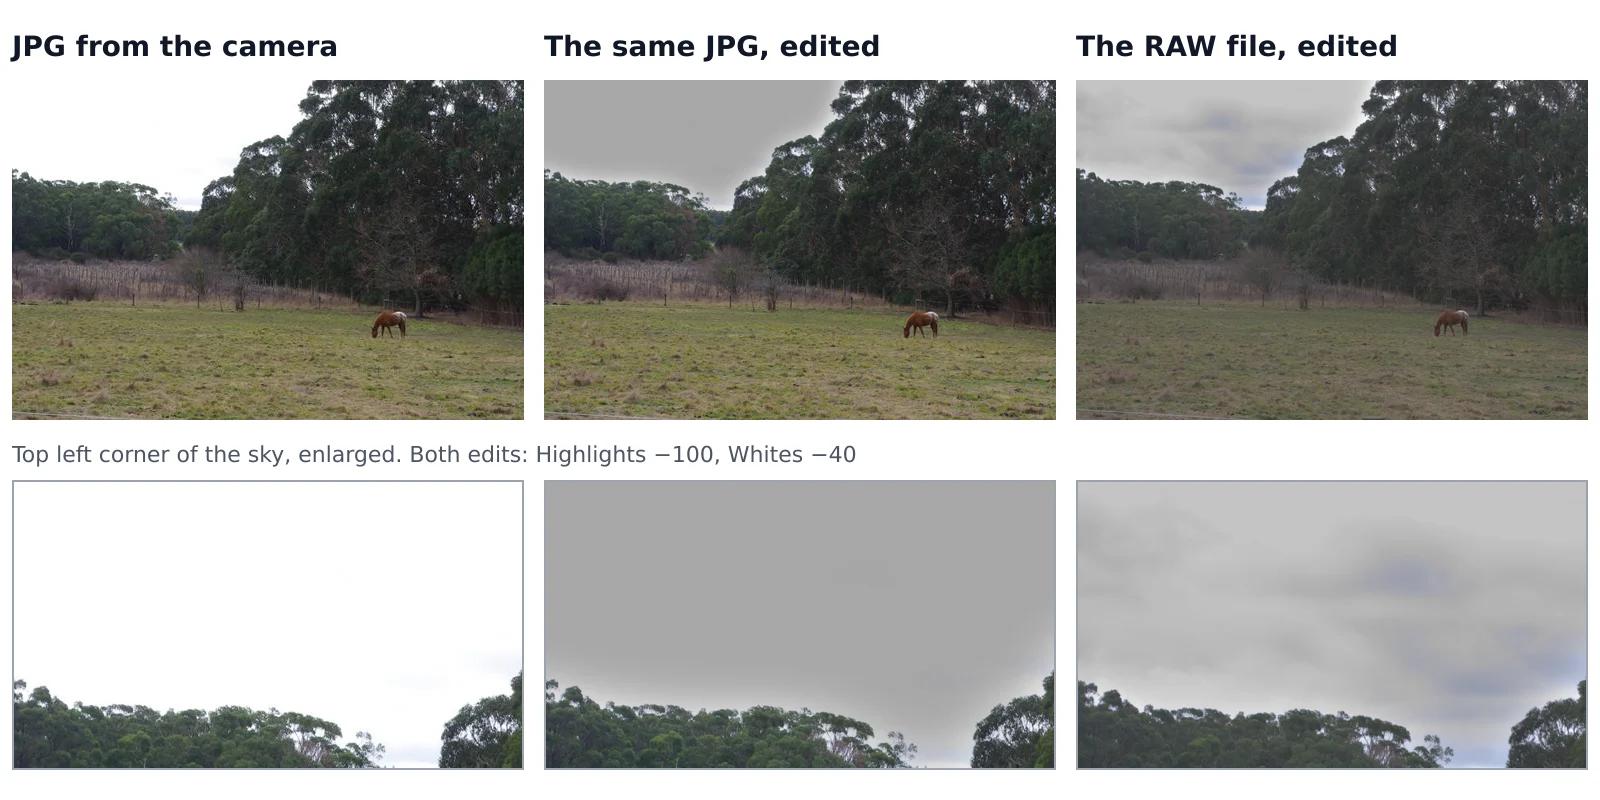
A sky that came out pure white looks the same whether you shot JPG or RAW, but it isn’t the same. In a JPG, the camera has already thrown away everything brighter than white. A RAW file often keeps some of it, and an editor can bring it back. We tested this on one shot that the camera saved both as a RAW file and as a JPG, with the same sliders on both.Read the guide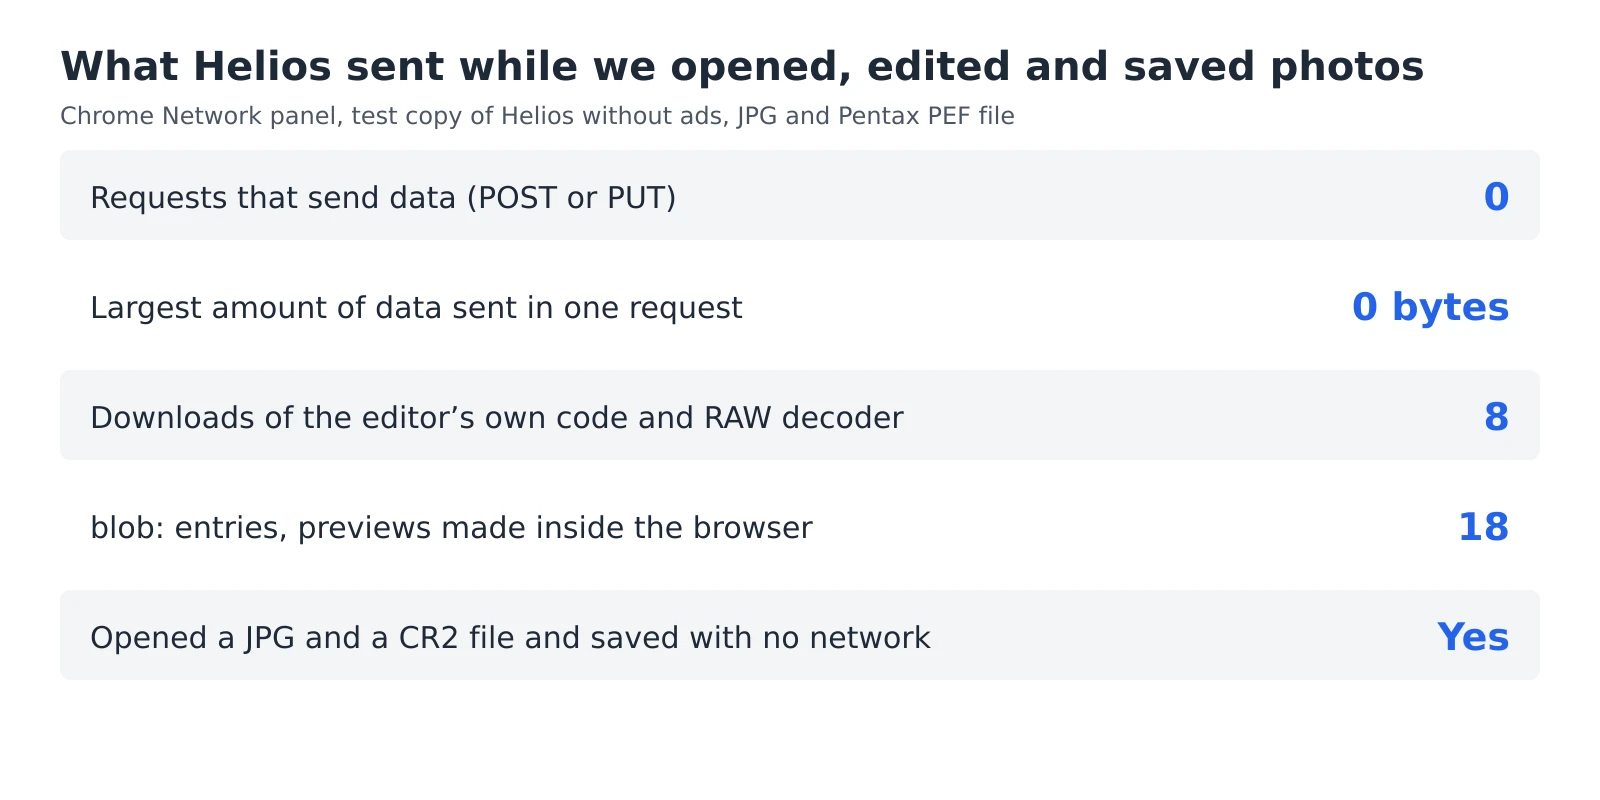 6 min read
How to check whether a photo editor uploads your photos
An editor can say that your photos stay private, but you don’t have to take its word for it. Every browser has a built-in list of everything a web page sends and receives, and a second test needs nothing more than switching off your Wi-Fi. Together they take five minutes and work with any editor that runs in a browser, including ours.Read the guide 7 min read
How to reduce noise in a photo without AI
A photo taken indoors or at dusk often looks fine on the phone screen and grainy on a computer. That grain is noise, and you can reduce it without any AI tool or subscription, with filters that photo editors have used for years. They work well up to a point, and we measured that point on a real photo taken at ISO 6400.Read the guide