How to reduce noise in a photo without AI
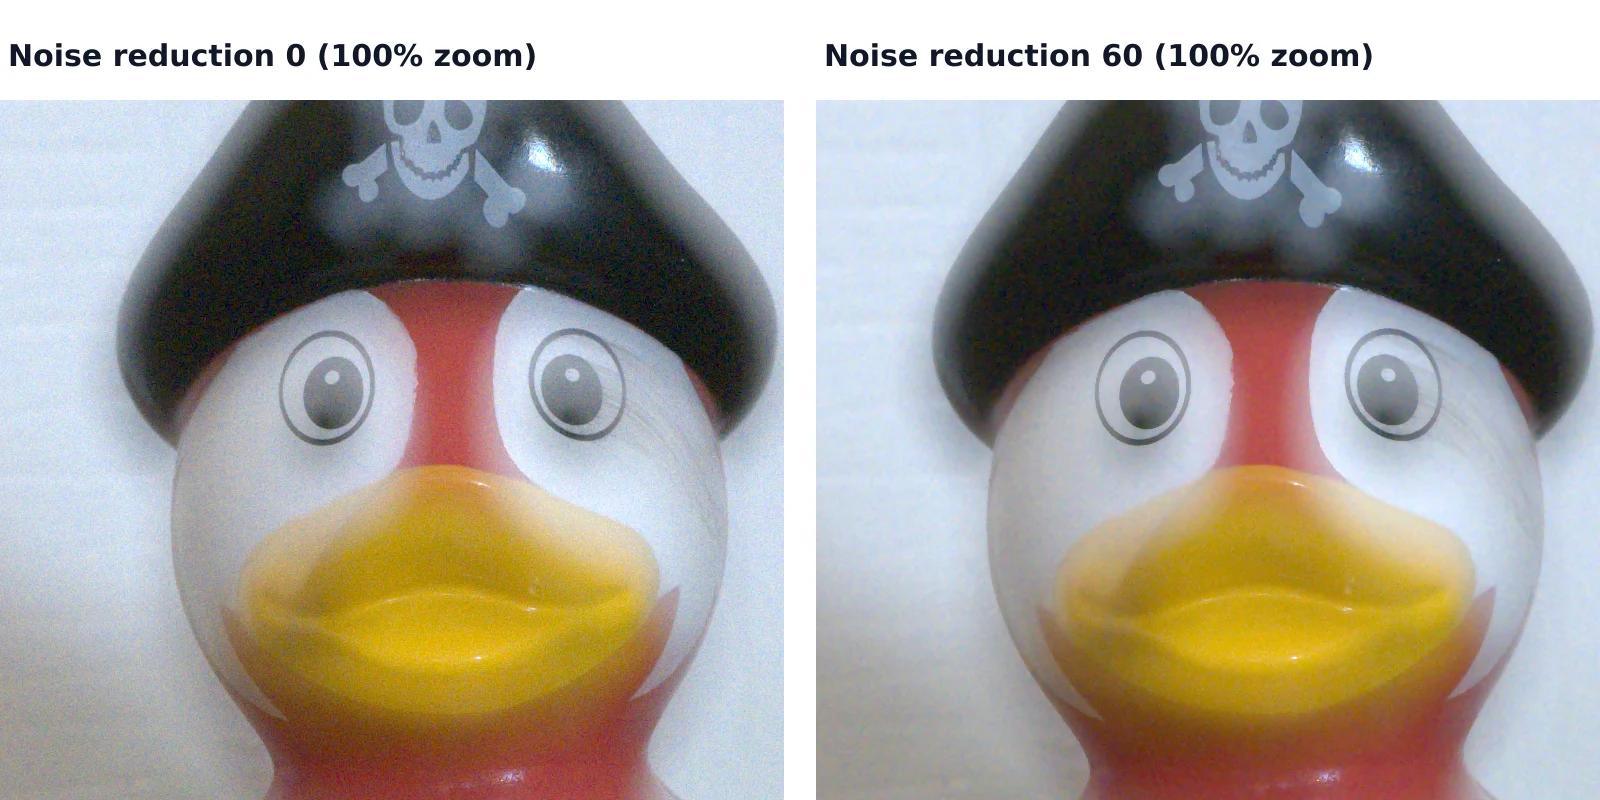
A photo taken indoors or at dusk often looks fine on the phone screen and grainy on a computer. That grain is noise, and you can reduce it without any AI tool or subscription, with filters that photo editors have used for years. They work well up to a point, and we measured that point on a real photo taken at ISO 6400.
What is noise in a photo?
Noise is random variation of brightness or colour that wasn’t in the scene (Wikipedia). It comes in two kinds. Luminance noise is grain: pixels that are a little lighter or darker than their neighbours, which many people find less disturbing because it looks like film grain. Colour noise, also called chroma noise, is red, green and blue speckles in areas that should be one colour. Most noise reduction methods remove colour noise more strongly, because a photo has little fine colour detail that could be lost (Wikipedia).
Noise grows as the ISO setting goes up, and that is why cameras automatically reduce noise more strongly at high ISO, which also smooths out fine detail (Wikipedia). The same happens in low light: the less light reaches the sensor, the more visible the noise.
How does noise reduction work without AI?
Every method answers the same question: is a difference between neighbouring pixels noise or detail? No method can answer it with certainty for every pixel (Wikipedia), so all of them trade some detail for less noise. The classic methods differ in how they make that trade:
- Blur averages each pixel with its neighbours. It removes noise and detail equally, so edges get soft.
- Bilateral filter also averages neighbours, but it gives less weight to pixels whose colour is very different (Wikipedia). Flat areas get smoother, while an edge between a dark and a light area stays sharp.
- Non-local means compares small patches across a larger part of the picture and averages the ones that look alike, which keeps more detail than local averaging (Wikipedia).
AI noise reduction uses a trained neural network instead of a fixed rule.
What does Helios use, and why?
Helios, our free photo editor, has a Noise reduction slider from 0 to 100 in the Detail section. It runs a bilateral filter on your graphics card, on the full-resolution pixels of the photo, so you see the result as you move the slider. While building the editor, we also tried non-local means on real RAW files. The improvement was too small to justify making the editor slower, so the bilateral filter stayed. Helios has no AI features at all, and your photos never leave your device.
What did noise reduction do to a real ISO 6400 photo?
| Measurement | Noise reduction 0 | Noise reduction 60 | Change |
|---|---|---|---|
| Luminance noise (spread of brightness, levels out of 255) | 4.32 | 1.74 | 60% less |
| Colour noise (spread of colour, levels out of 255) | 9.47 | 5.81 | 39% less |
What do the numbers show?
At 60, the slider removed most of the grain: the brightness of flat areas varied 60% less than before. On the cover photo you can see that the white surfaces got smoother, while the edges of the eyes and the hat didn’t blur, which is how a bilateral filter is meant to work. Colour noise dropped less, by 39%. Helios has one slider for both kinds of noise, and in this photo it was gentler on the coloured speckles than on the grain. If coloured speckles bother you more than grain, a little more Noise reduction helps, but check the edges at 100% so that fine detail doesn’t turn smudgy.
How do you reduce noise without losing detail?
The names are the ones in Helios. The same order works in most editors.
1. Zoom to 100%
Noise is almost invisible on a scaled-down preview. Click 100% in the zoom buttons and look at a flat area, such as a wall or the sky.2. Brighten first, then reduce noise
Brightening makes noise more visible. Set the light first, so you can see how much noise you really need to remove.3. Raise Noise reduction slowly
Stop as soon as the flat areas look calm. Past that point, faces and fabrics start to look like plastic.4. Add sharpening last, and only a little
Sharpening makes noise stronger again. In Helios, Sharpening works only on edges, so a moderate amount leaves the smoothed areas alone.
How do you get less noise in the first place?
Give the sensor more light. In low light, a longer exposure time or a wider aperture collects more light and reduces noise (Wikipedia), so lean on a wall or use a tripod instead of raising the ISO. A photo that is too dark and brightened later has more visible noise than one exposed brighter in the camera. Our guide on fixing a dark photo explains how far you can brighten before noise and banding appear.
Sources
- Image noise, Wikipedia
- Bilateral filter, Wikipedia
- Non-local means, Wikipedia
Frequently asked questions about noise reduction
Is noise the same as grain?
Not quite. Grain is the look of film, and luminance noise in a digital photo resembles it. The Grain slider in Helios adds an even, fine grain on purpose, for a film look, while noise is random and uneven.
Can I remove noise from a JPG?
Yes, the slider works on any photo. Most cameras and phones already reduce noise when they turn sensor data into a JPG (Wikipedia), so a little more is usually enough.
More guides
 6 min read
Can you fix an overexposed photo? What RAW gets back and JPG doesn’t
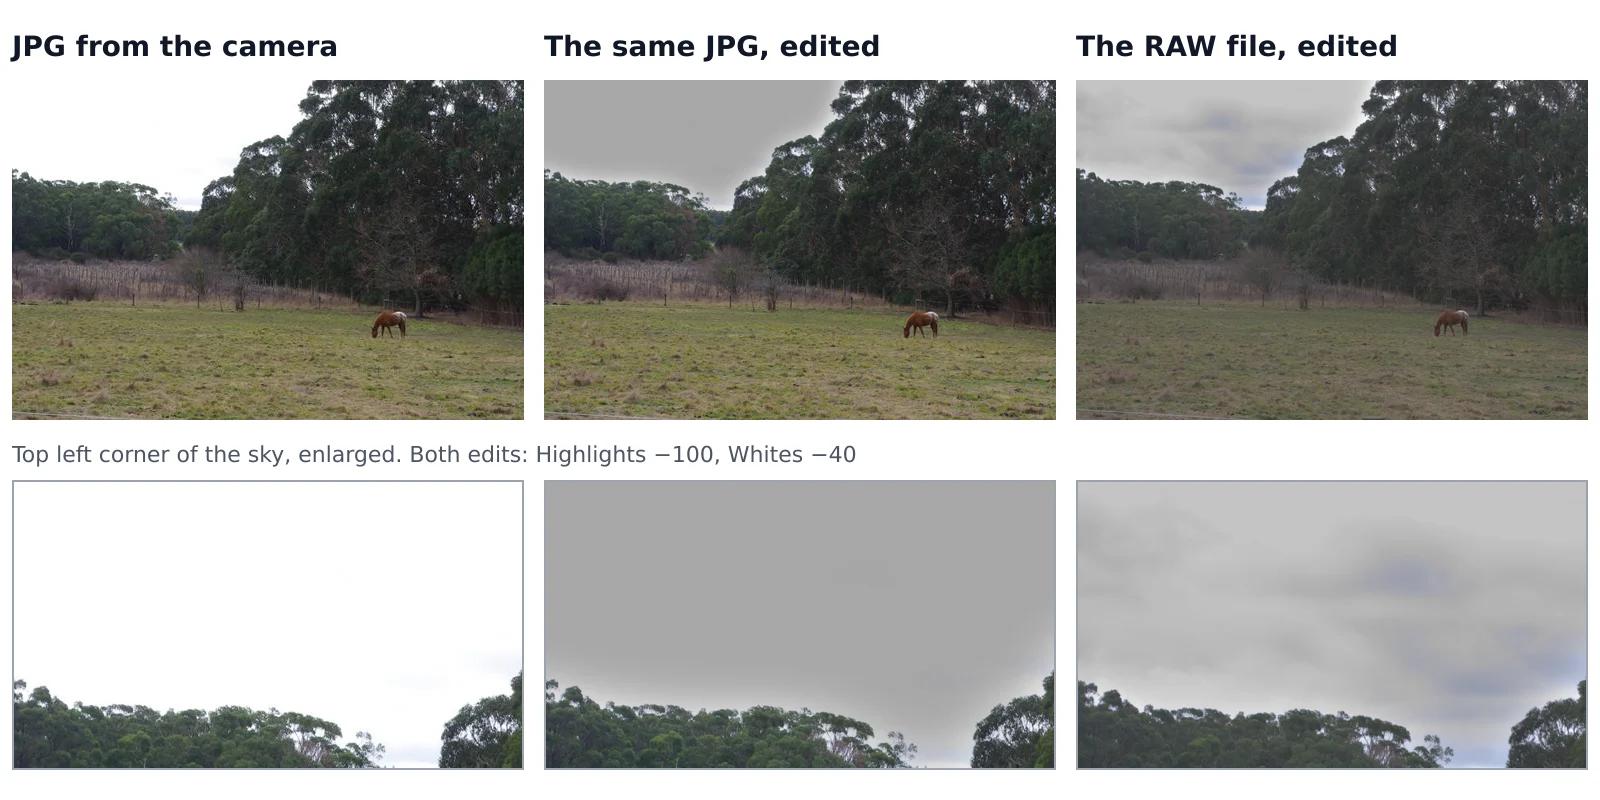
A sky that came out pure white looks the same whether you shot JPG or RAW, but it isn’t the same. In a JPG, the camera has already thrown away everything brighter than white. A RAW file often keeps some of it, and an editor can bring it back. We tested this on one shot that the camera saved both as a RAW file and as a JPG, with the same sliders on both.Read the guide 6 min read
How to check whether a photo editor uploads your photos
An editor can say that your photos stay private, but you don’t have to take its word for it. Every browser has a built-in list of everything a web page sends and receives, and a second test needs nothing more than switching off your Wi-Fi. Together they take five minutes and work with any editor that runs in a browser, including ours.Read the guide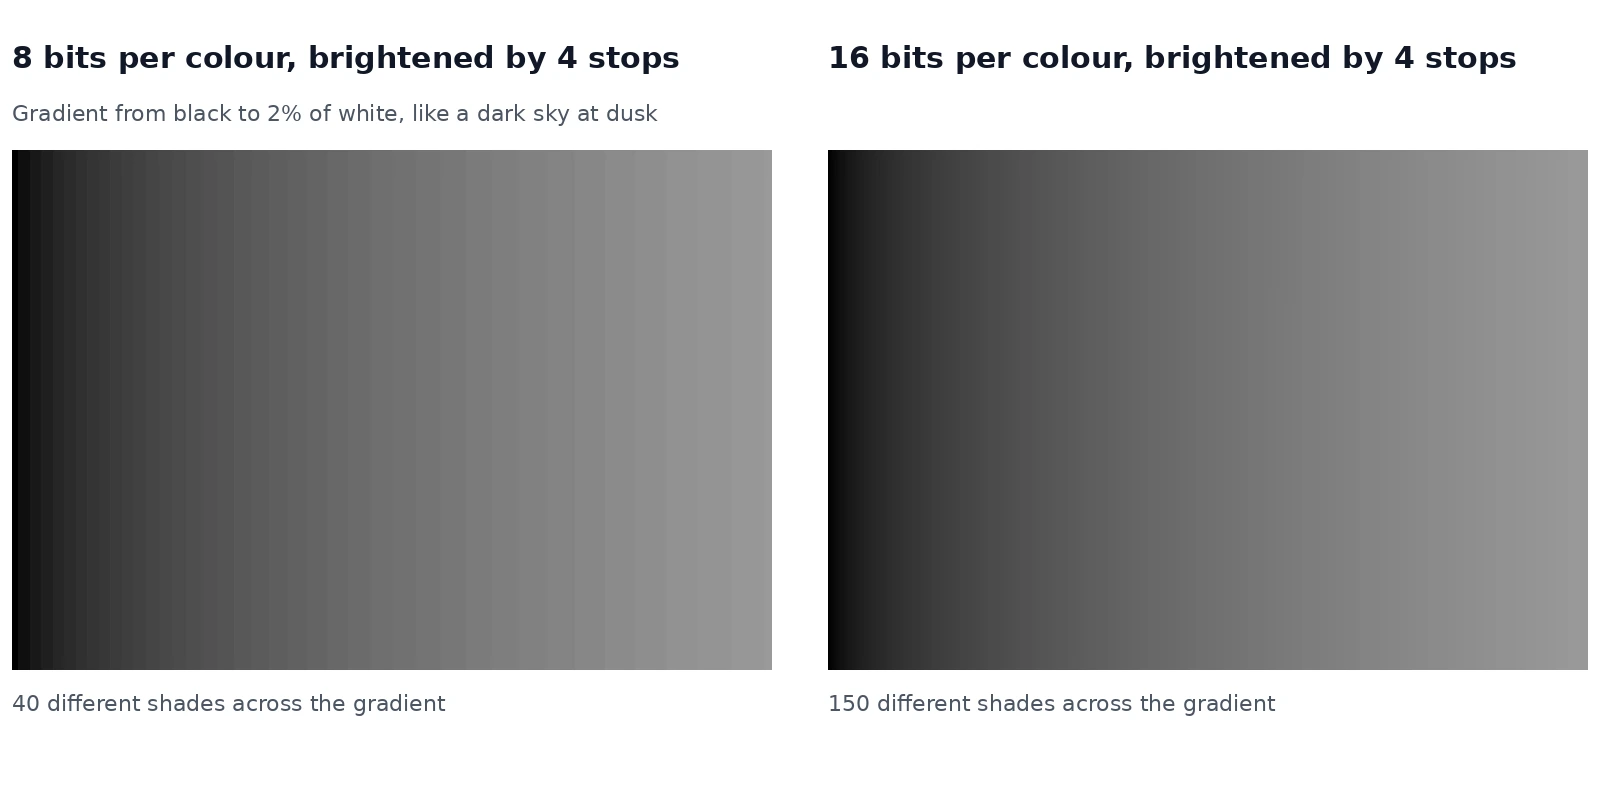 6 min read
Why brightening a photo causes stripes, and when RAW prevents them
When you brighten a dark photo a lot, a smooth sky or shadow can break into visible steps. This is called banding. Whether you get it depends on how many shades the file holds, and on something easy to overlook: the natural noise in a real photo often hides it. We measured both.Read the guide