Can you fix an overexposed photo? What RAW gets back and JPG doesn’t
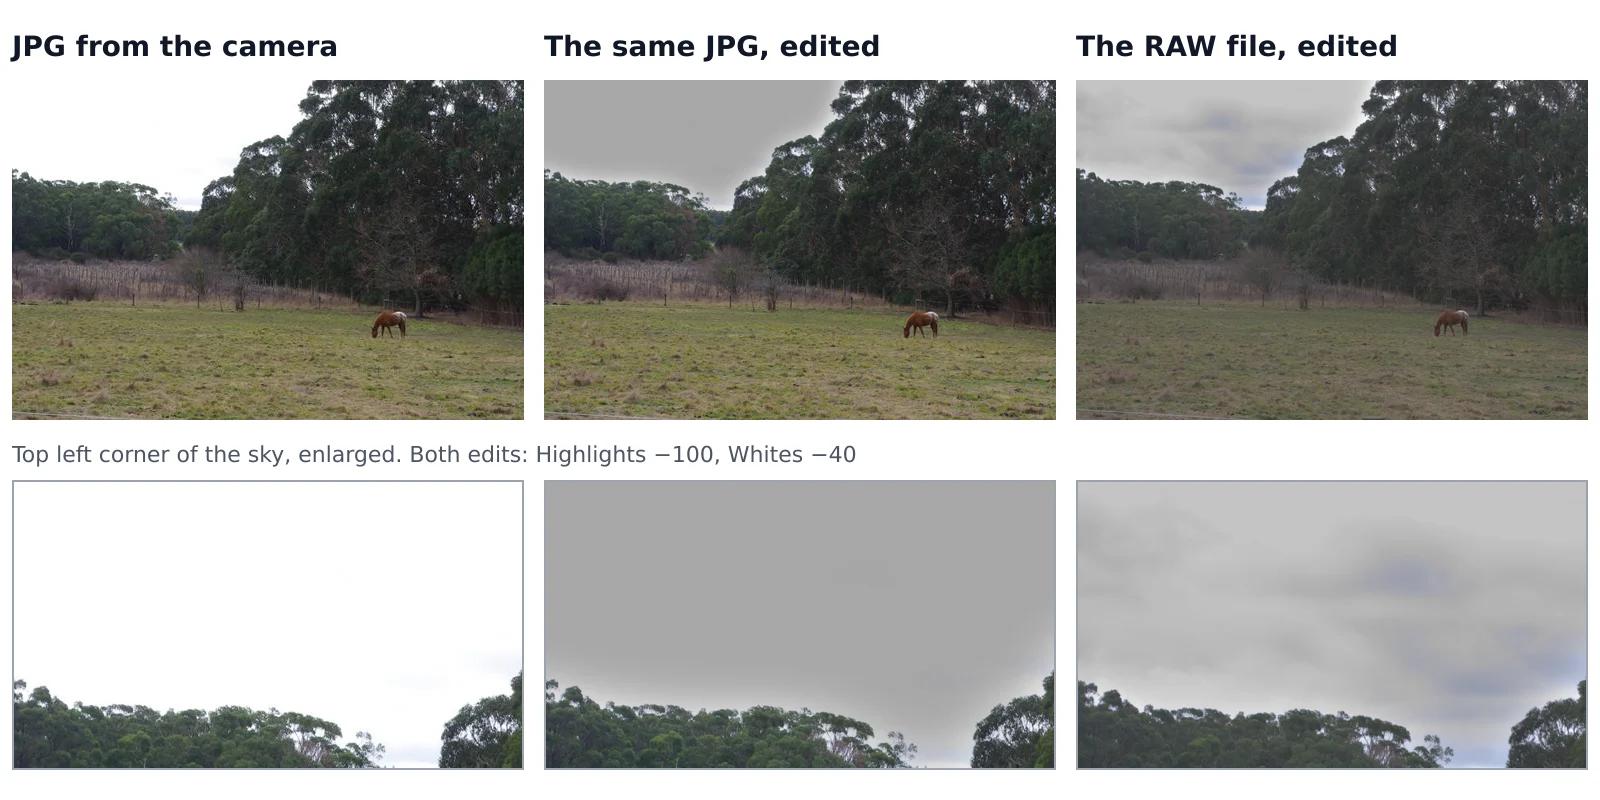
A sky that came out pure white looks the same whether you shot JPG or RAW, but it isn’t the same. In a JPG, the camera has already thrown away everything brighter than white. A RAW file often keeps some of it, and an editor can bring it back. We tested this on one shot that the camera saved both as a RAW file and as a JPG, with the same sliders on both.
Why does an overexposed area lose its detail?
A camera and a file can record brightness only up to a certain limit. Everything brighter is saved at the maximum value, so a bright sky, a white wall or a wedding dress turns into an even white patch with no detail. Photographers call this clipping (Wikipedia). Clipping can happen on the sensor itself, when too much light reaches it, or later, when the camera turns the sensor data into a JPG. When it happens inside the camera, the detail can often be partly or fully recovered from the RAW file (Wikipedia).
The reason is in the numbers. A JPG has 256 levels per colour, while a camera usually records RAW data with 12 or 14 bits, which is 4,096 or 16,384 levels (Wikipedia). When the camera makes a JPG, it fits the brightness it recorded into those 256 levels, and the brightest part of the scene can end up above the top level, as in our test below.
How much did RAW recover in our test?
| Measurement | JPG | RAW |
|---|---|---|
| Blown-out area of the whole photo before editing | 15.6% of pixels with all three colours at 250 or more | 14.6% in the default view of Helios, measured the same way |
| Sky in the top left corner before editing | 100% pure white | pure white in the default view |
| Same corner after editing: spread of brightness | 0.5 levels | 8.6 levels |
| Same corner after editing: number of different brightness levels | 13 | 41 |
| What you see in the sky after editing | An even grey patch | Grey clouds with faint blue patches |
What do these numbers mean?
Before editing, both versions looked almost the same. In the default view of Helios, our free photo editor, the RAW file also had a white sky, with 14.6% of the photo blown out against 15.6% in the JPG. The difference appeared only when we moved the sliders. In the JPG, the sky turned from white to an even grey: its brightness varied by half a level, which the eye sees as a flat colour. In the RAW file, the sky varied by 8.6 levels, enough to show the shapes of the clouds and a few faint patches of blue.
So a RAW file isn’t a guarantee. It keeps the detail that the camera cut off when making its JPG, but not the detail that never reached the sensor. If even the RAW file stays white after Highlights at −100, that part of the photo was clipped on the sensor and no editor can bring it back.
How do you rescue an overexposed photo?
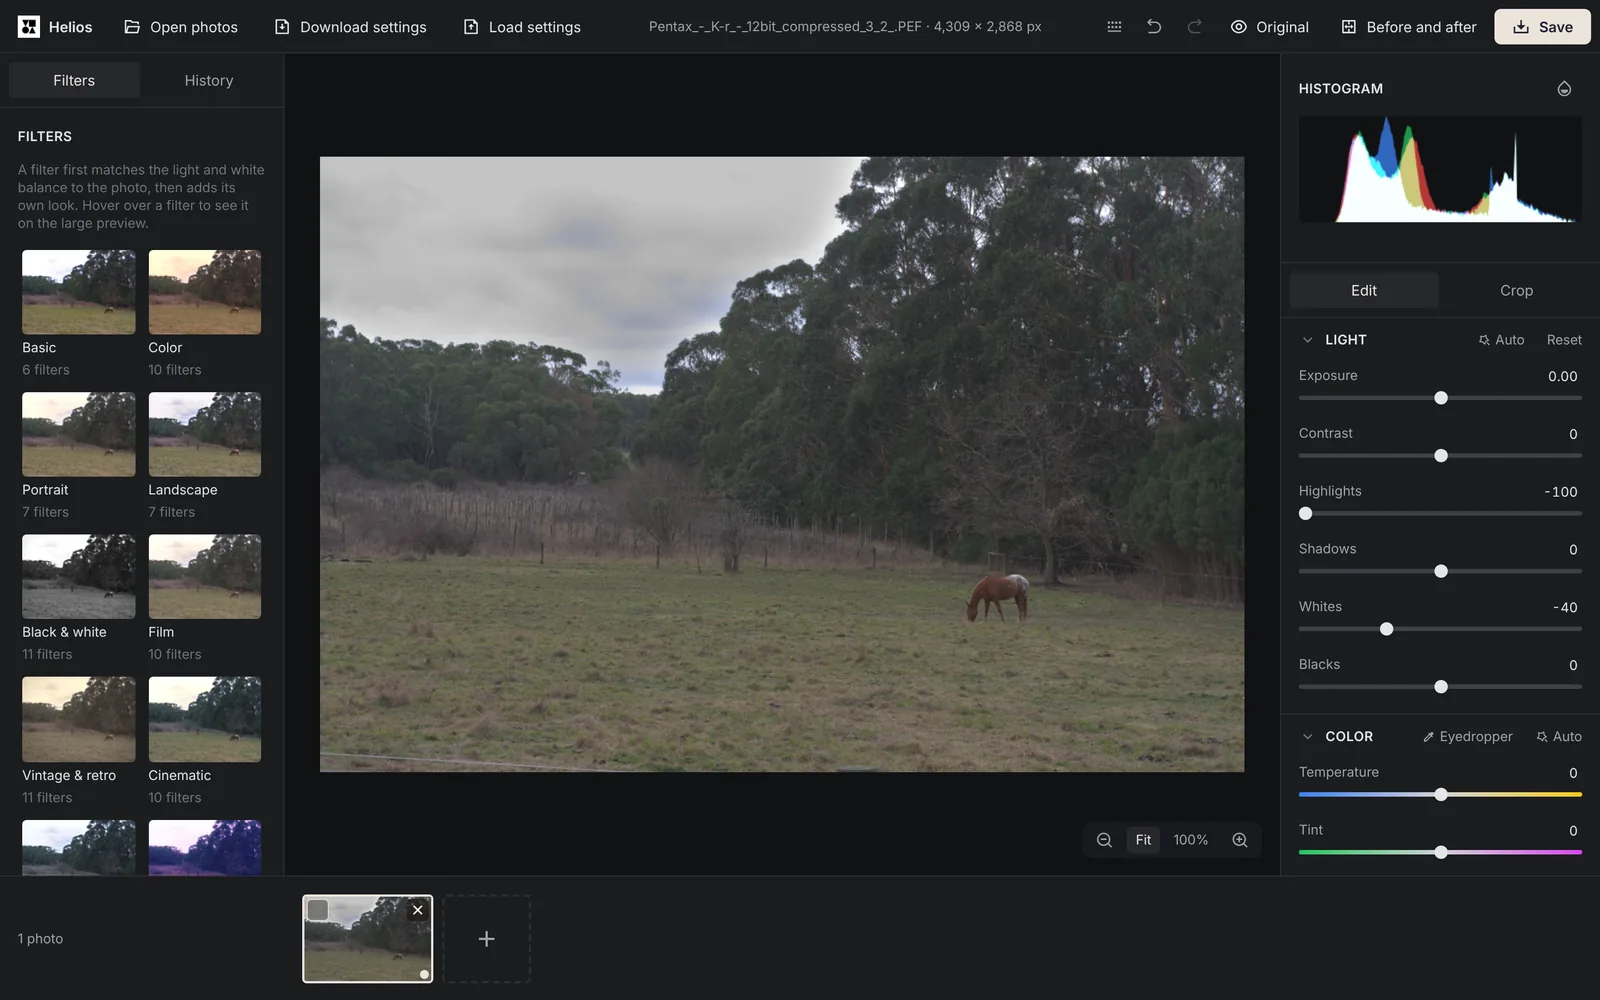
The steps use the slider names in Helios, and most editors have sliders with the same names.
1. Open the RAW file if you have one
If your camera saved RAW and JPG together, edit the RAW file. It’s the version that may still hold the bright detail.2. Turn on Show clipping
Press J or click the icon next to Histogram. Red marks areas with no detail left, so you see what you are working on.3. Lower Highlights, then Whites
Move Highlights to the left to bring back the bright areas, then Whites if the red marks are still there. Lower Exposure only if the whole photo is too bright.4. Accept what stays white
If an area stays red at the end of the sliders, the detail is gone. An even grey sky often looks less natural than a white one, so bring Whites back up a little.
How do you avoid overexposure next time?
Most cameras show a histogram and blinking warnings for blown-out areas on their screen after each shot. When a bright sky or a white dress blinks, take the photo again with exposure compensation at −1, which halves the light, since each stop doubles or halves it (Wikipedia). A slightly dark RAW file is easy to brighten later, while a clipped one can’t be fixed. Our guide on fixing a dark photo shows how far you can brighten without trouble.
Sources
- Clipping (photography), Wikipedia
- Raw image format, Wikipedia
- Exposure value, Wikipedia
- Digital Negative, Wikipedia
Frequently asked questions about overexposed photos
Can I fix an overexposed photo from my phone?
Partly. A normal phone photo is already a processed JPG or HEIC, so it behaves like the JPG in our test. Phones that shoot RAW usually save it as DNG (Wikipedia), and those files keep more of the bright tones.
Why does the sky turn grey instead of blue?
Because the colour was lost along with the brightness. When all three colours reached their maximum, the area is pure white, and darkening it can only make it grey. Blue comes back only where the RAW file still holds it.
More guides
 6 min read
How to check whether a photo editor uploads your photos
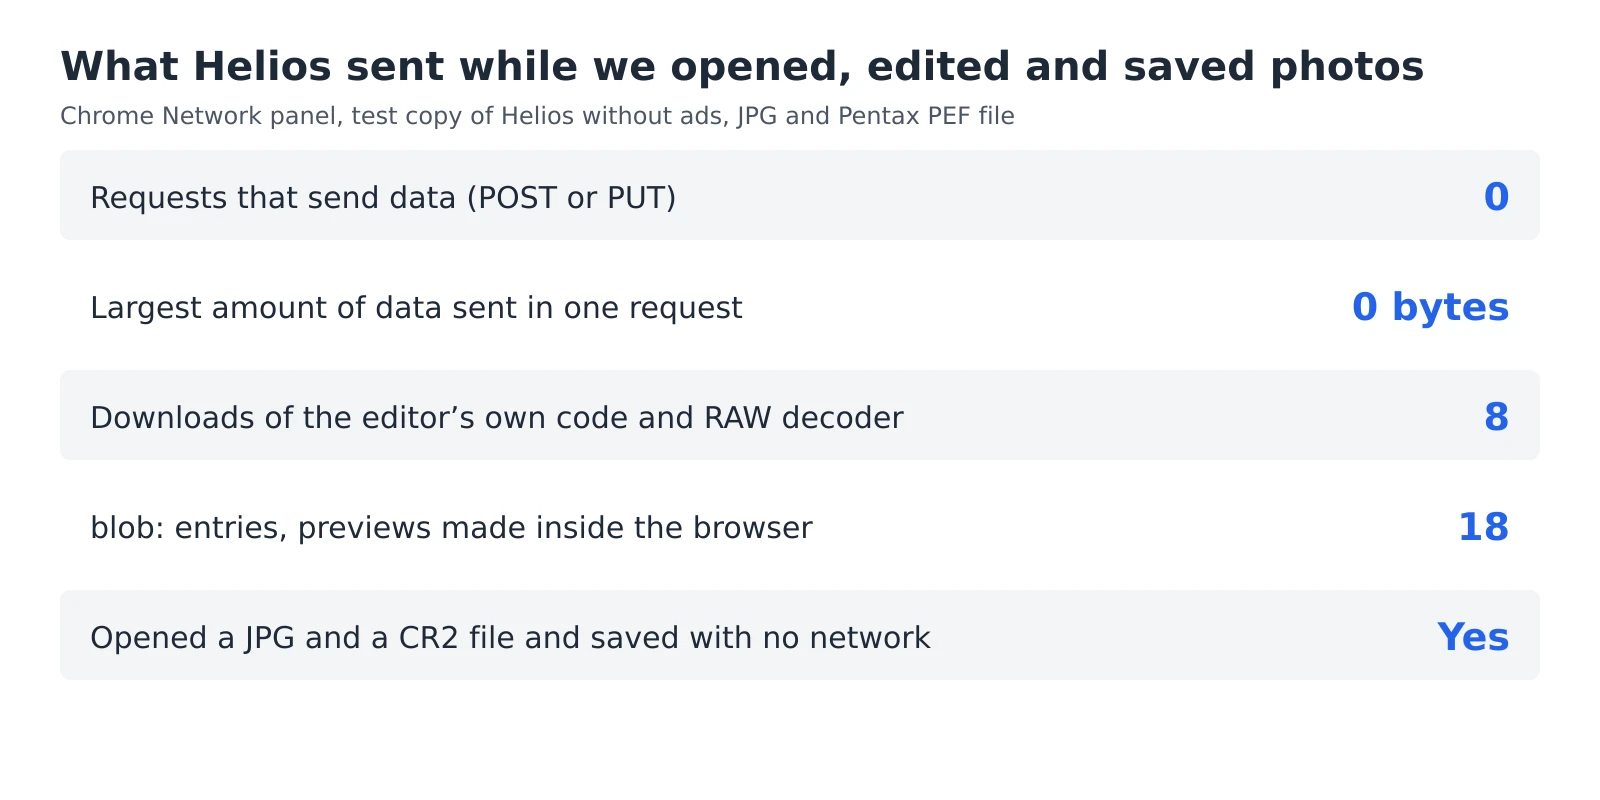
An editor can say that your photos stay private, but you don’t have to take its word for it. Every browser has a built-in list of everything a web page sends and receives, and a second test needs nothing more than switching off your Wi-Fi. Together they take five minutes and work with any editor that runs in a browser, including ours.Read the guide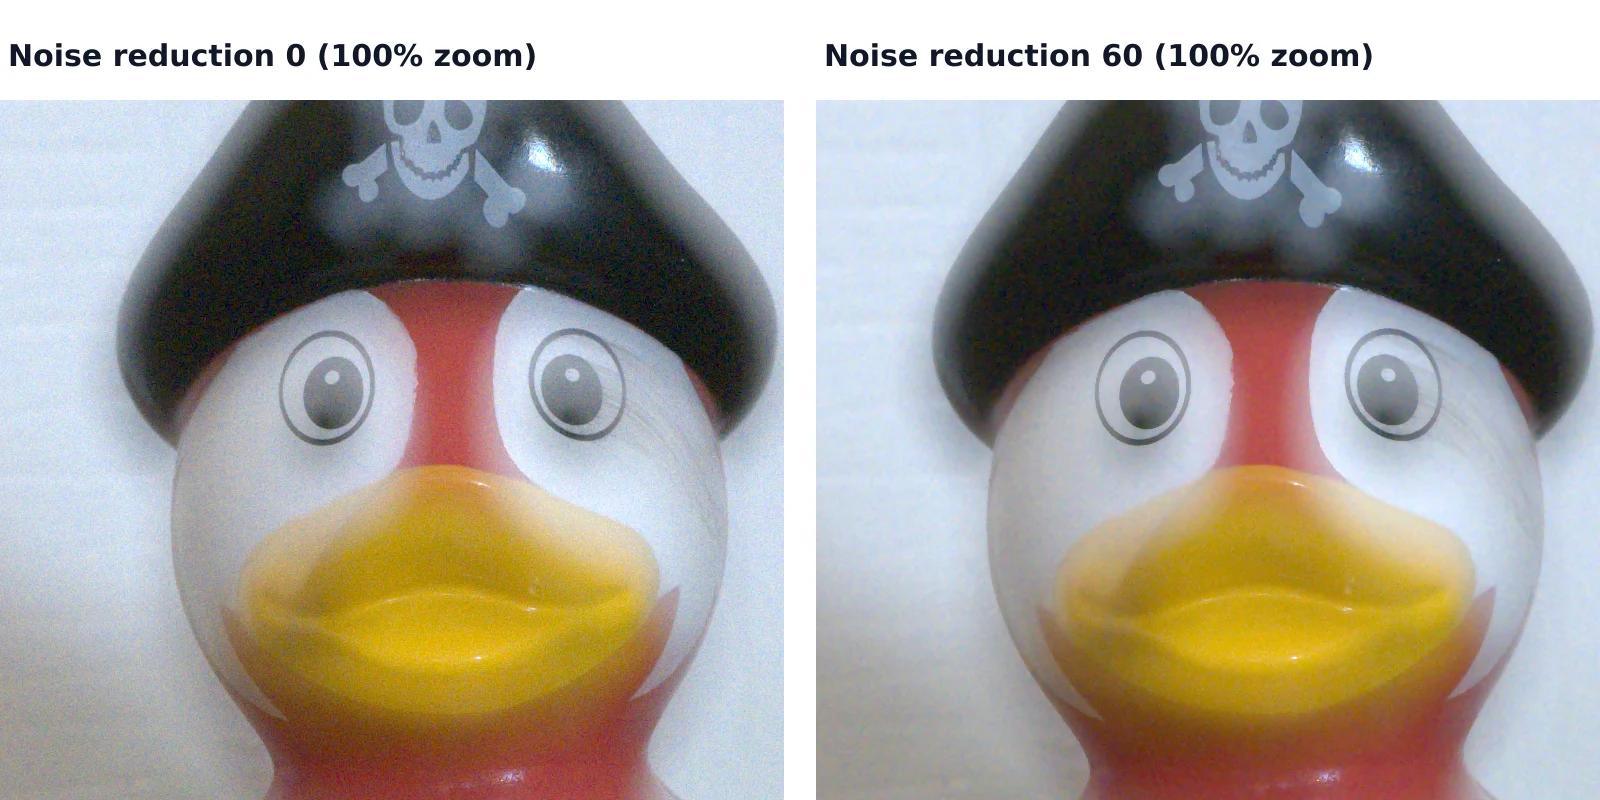 7 min read
How to reduce noise in a photo without AI
A photo taken indoors or at dusk often looks fine on the phone screen and grainy on a computer. That grain is noise, and you can reduce it without any AI tool or subscription, with filters that photo editors have used for years. They work well up to a point, and we measured that point on a real photo taken at ISO 6400.Read the guide 6 min read
Why brightening a photo causes stripes, and when RAW prevents them
When you brighten a dark photo a lot, a smooth sky or shadow can break into visible steps. This is called banding. Whether you get it depends on how many shades the file holds, and on something easy to overlook: the natural noise in a real photo often hides it. We measured both.Read the guide