How to convert RAW to JPG for free: CR3, NEF, ARW and DNG
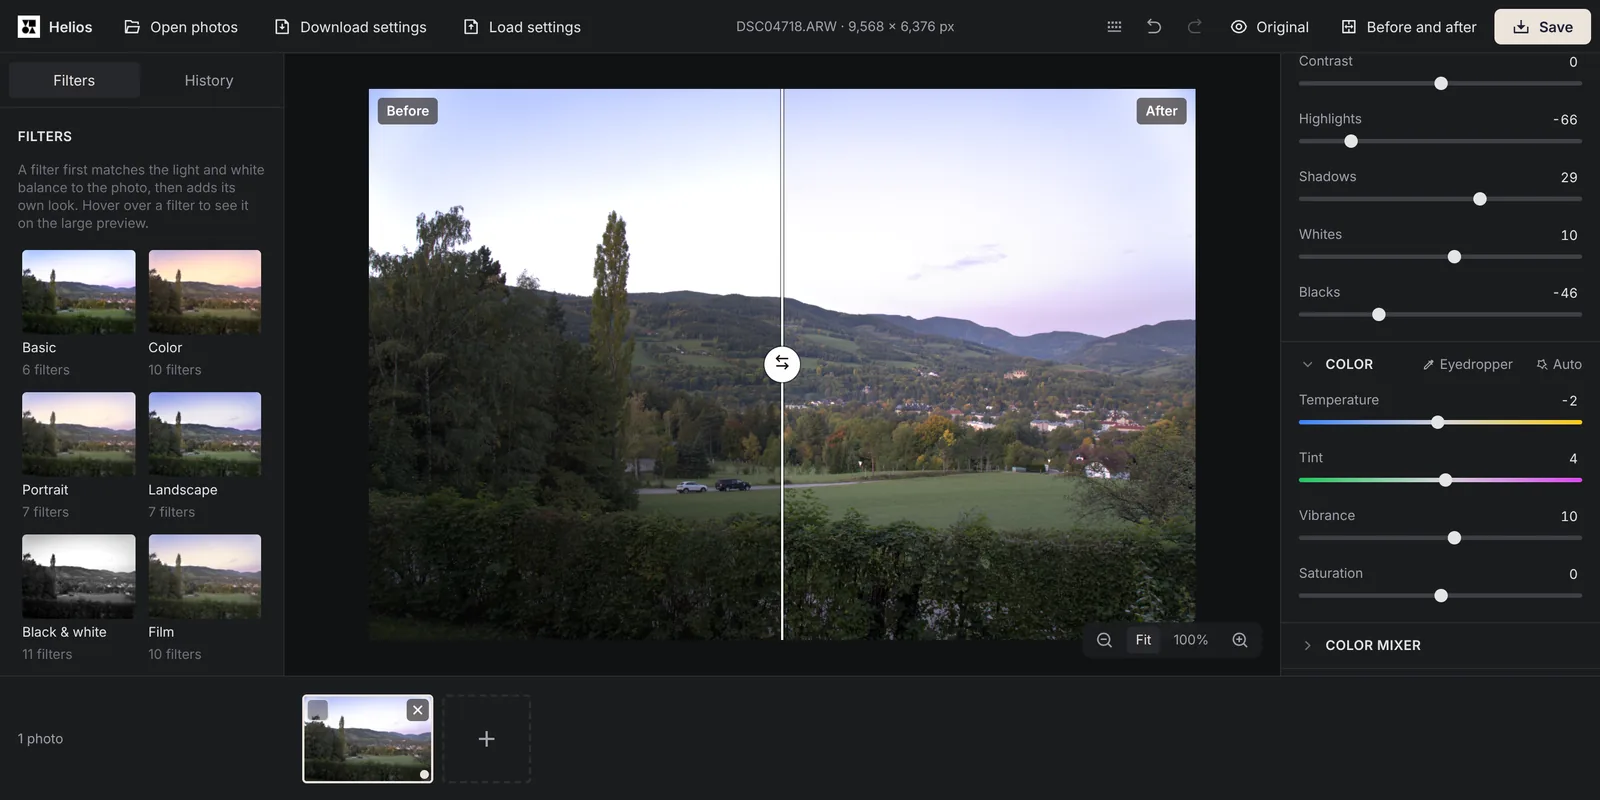
Your camera saves RAW files that many apps, websites and photo labs won’t accept. To share or print those photos, you turn each file into a JPG, and you can do it for free in your browser, for one photo or a whole memory card, without installing anything.
Why can’t you just rename a RAW file to .jpg?
A RAW file doesn’t contain a picture yet. It holds the readings from each point of the camera’s sensor, usually at 12 or 14 bits per channel, which gives 4,096 to 16,384 shades per colour, while a JPG can store 256 (Wikipedia). Changing the extension doesn’t change the contents, so a renamed file still won’t open as a photo.
Turning those readings into a picture is called developing, after the darkroom process for film. On most cameras each sensor point records only red, green or blue, so the software first works out the two missing colours from the neighbouring points. Then it applies the white balance, sets the brightness and contrast and fits the result into the 8 bits per channel of a JPG (Wikipedia). The camera saves your white balance and picture settings in the RAW file but leaves the developing to the program you open it in, so you can develop the same file again and again with different settings.
How do you convert a RAW file to JPG in your browser?
These steps work the same way for every RAW format Helios opens, from a Canon CR3 to a DNG from a phone. The editor runs in Chrome, Edge, Firefox and Safari, on a computer, tablet or phone.
1. Open the editor
Go to Helios and click Open Helios. The editor fills the whole screen and lists the formats it accepts.2. Add your RAW files
Drag the files onto the editor, or click Open photos (Ctrl+O, or Cmd+O on a Mac) and pick them on your computer or straight from the memory card. The photo appears within about 0.2–0.3 s from the preview the camera saved in the file, and you can start editing once the editor has developed the whole file.3. Fix the light and colour if you need to
Click Auto in the Light section and then in the Color section, and fine-tune any slider afterwards. If the photo already looks right, skip this step.4. Save it as a JPG
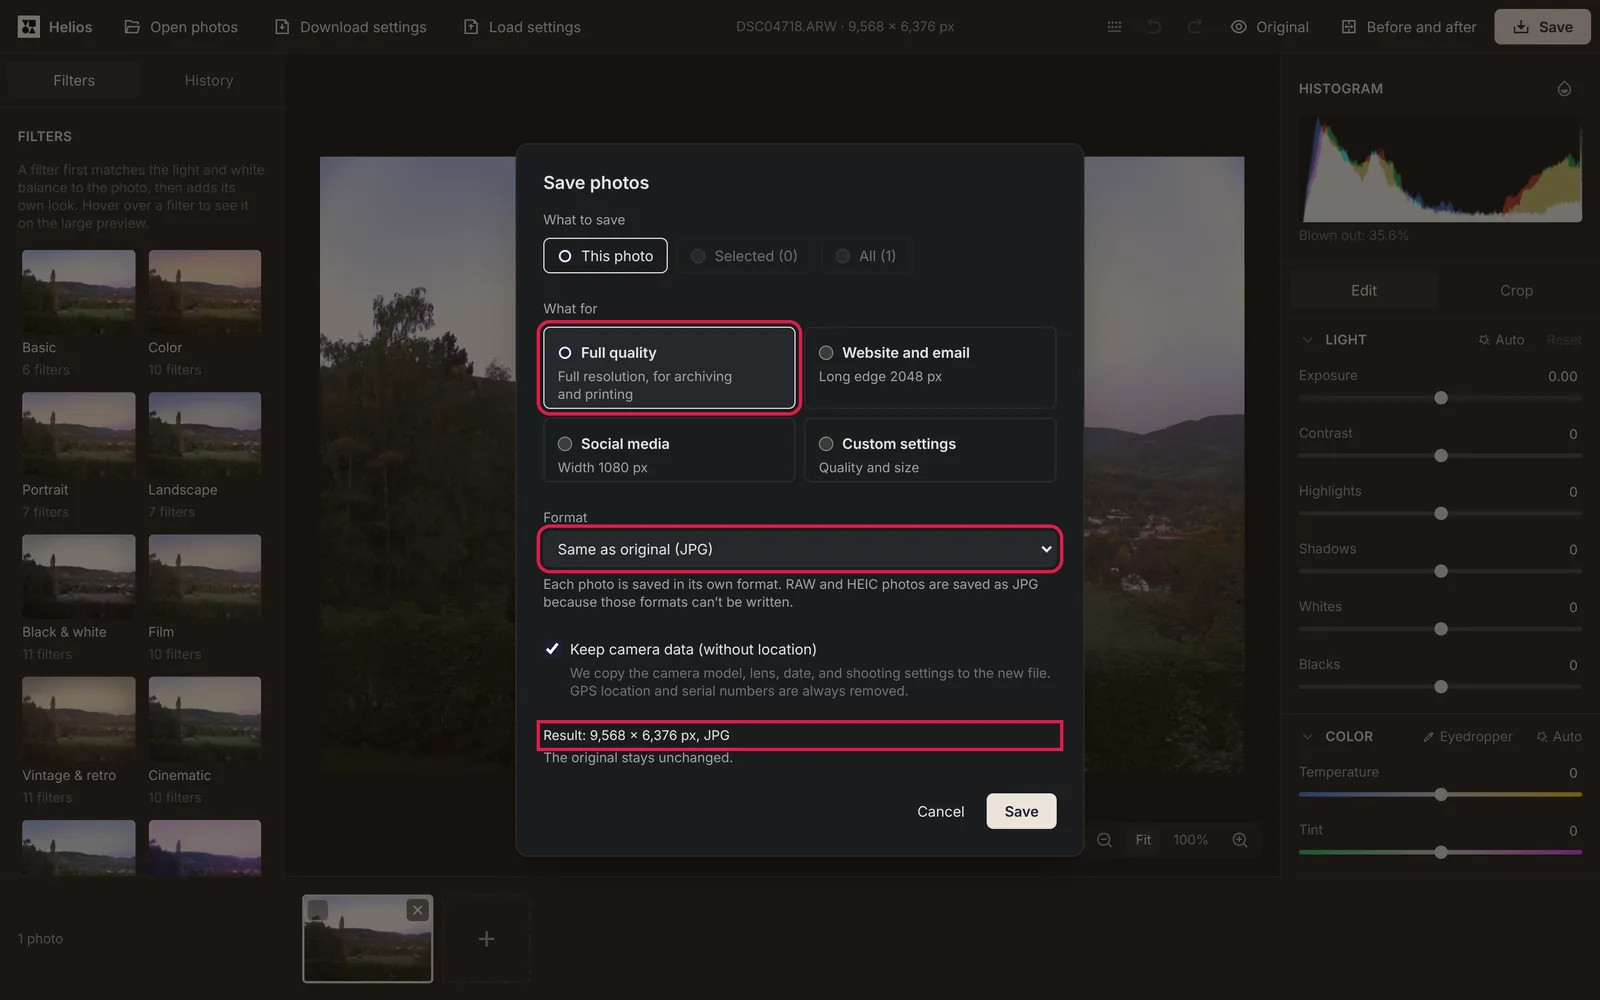
Click Save (Ctrl+S). Leave Format on Same as original, which saves RAW files as JPG, choose Full quality under What for and click Save in the window. The new file keeps the original name with a suffix, for example DSC04718-helios.jpg, and your RAW file stays untouched.
Can you convert RAW to JPG without losing quality?
Not completely, because the JPG has far fewer shades per colour than the RAW file, and JPG compression always throws away some fine detail. What you can do is keep that loss small enough that nobody sees it.
- Choose Full quality under What for. The JPG keeps the full resolution of the photo at 95% quality, which is enough for prints and for sharing.
- If you want the highest setting, choose Custom settings and set the quality to 100%. The file comes out larger than at 95%.
- If you’ll keep editing the photo in another program, save it as a PNG or TIFF instead. Both formats store the photo without compression loss, but the file is much larger than a JPG.
- Fix the light and colour before you save. A RAW file has much more room for brightening shadows and darkening a bright sky than the JPG you’ll get from it, so corrections made later on the JPG give a worse result.
Keep the RAW files after converting them. A JPG can’t be turned back into RAW, because the data it threw away is gone, while the RAW file lets you develop the photo again whenever you like.
How do you convert a whole memory card at once?
Select all the RAW files in the file picker after clicking Open photos, or drag the whole folder’s contents onto the editor. Every photo appears in the thumbnail strip at the bottom straight away, and the editor opens up to three at a time while the rest wait their turn.
When you click Save, choose All under What to save. Helios saves every photo as a JPG and puts them in one ZIP file called helios-photos.zip, so your browser downloads a single file. If the photos come from one shoot and need the same corrections, fix one of them first and copy its settings to the rest, as described in our guide on how to batch edit photos.
Why does the JPG look different from the photo on your camera screen?
The picture on the camera screen is a JPG that the camera developed with its own picture style and saved inside the RAW file as a preview (Wikipedia). Every program that develops the raw data does it in its own way, so the same file can come out with slightly different contrast and colours in each of them. Helios develops the photo from the raw data and doesn’t use that preview, so the photo can look a little flatter at first.
The Auto buttons in the Light and Color sections bring most photos close to what you expect. If you want stronger contrast and colours, move Contrast and Vibrance to the right, and if the photo looks too cold, move Temperature to the right as well.
Can you convert RAW to JPG on a Mac without extra software?
Yes, for photos from cameras that macOS supports. Since 2005, macOS has been able to read RAW files itself, so Preview opens them like any other image (Wikipedia). Open the file in Preview, choose File and then Export, pick JPEG in the Format menu and click Save (Apple Support).
If you want to fix the light before saving, convert a whole shoot at once or work on a Windows computer, Helios does the same job in the browser.
Sources
- Raw image format, Wikipedia
- Convert image file types using Preview on Mac, Apple Support
Frequently asked questions about converting RAW to JPG
Will the JPG keep the date and camera settings?
Yes. The Keep camera data (without location) option in the save window is on by default, so the JPG keeps the camera model, lens, date and shooting settings. The GPS location and the serial numbers are always removed.
Why does a RAW file take longer to open in Firefox?
Firefox develops RAW files several times more slowly than Chrome and Edge, and the editor tells you so when you open the first one. If you convert a lot of RAW files, Chrome or Edge will get through them faster.
More guides
 6 min read
Can you fix an overexposed photo? What RAW gets back and JPG doesn’t
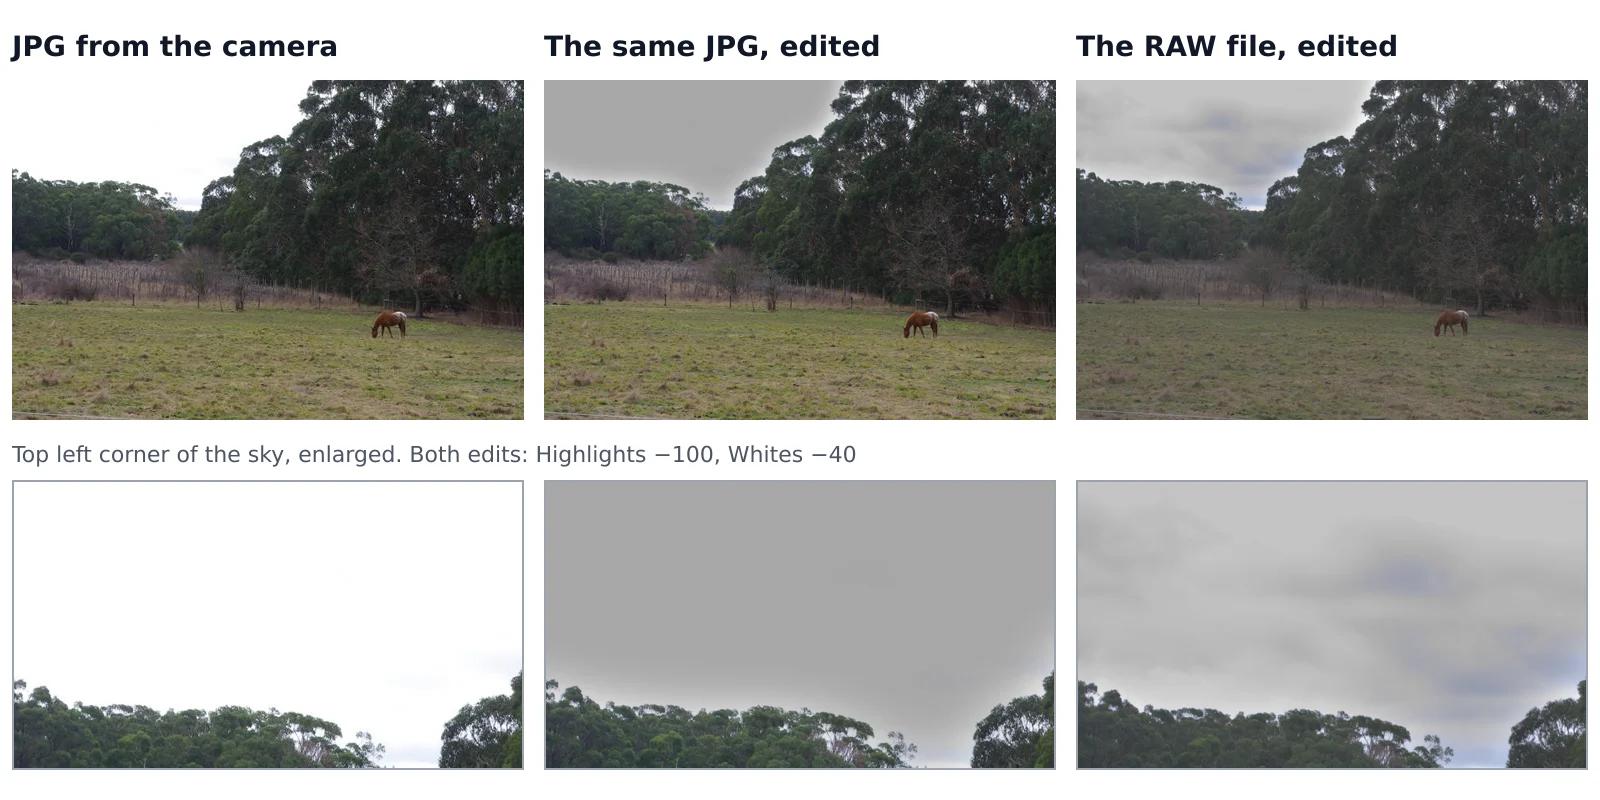
A sky that came out pure white looks the same whether you shot JPG or RAW, but it isn’t the same. In a JPG, the camera has already thrown away everything brighter than white. A RAW file often keeps some of it, and an editor can bring it back. We tested this on one shot that the camera saved both as a RAW file and as a JPG, with the same sliders on both.Read the guide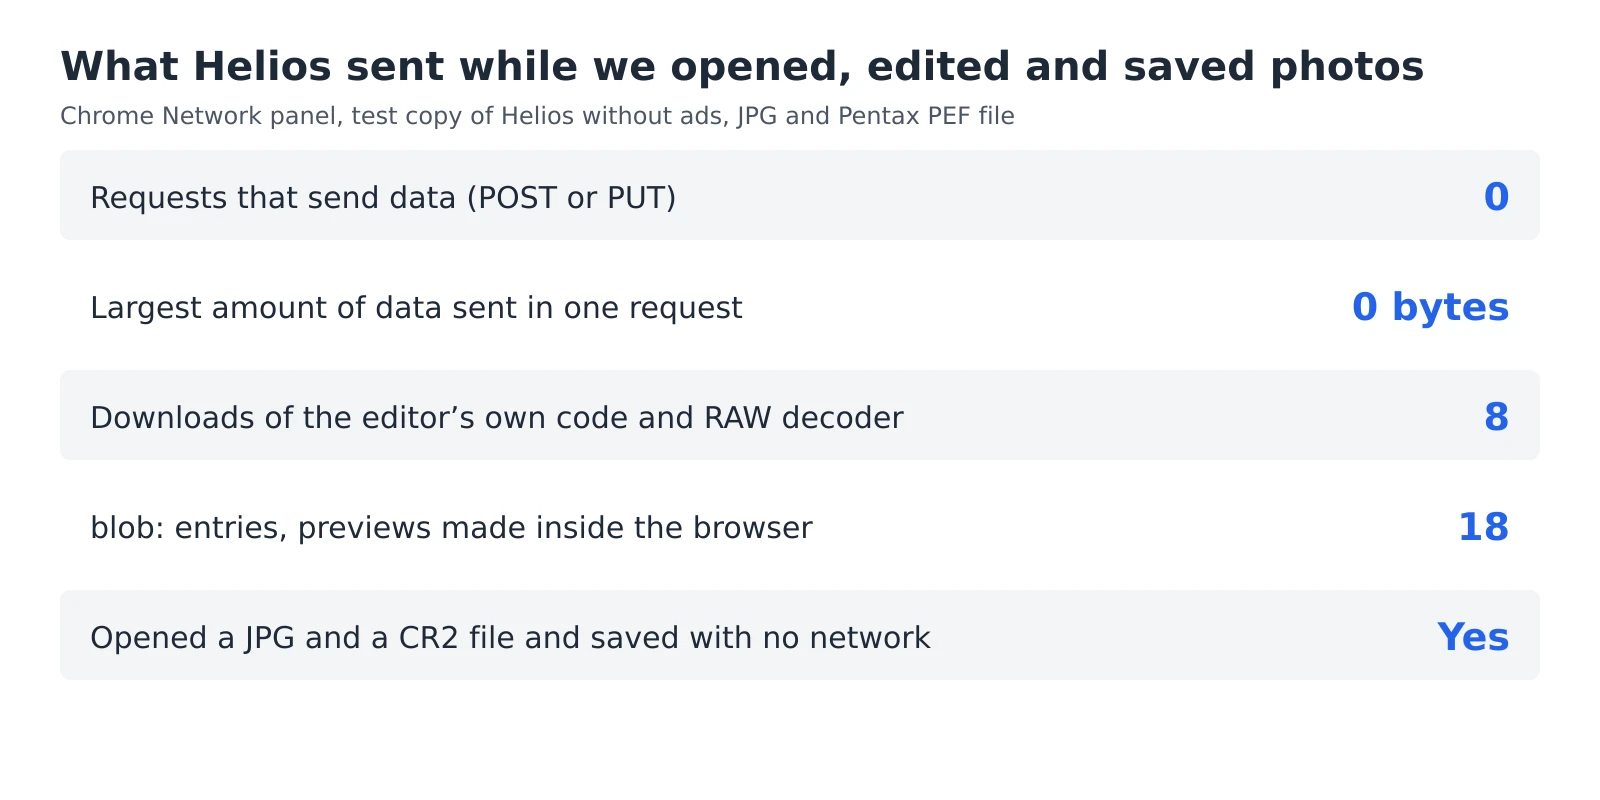 6 min read
How to check whether a photo editor uploads your photos
An editor can say that your photos stay private, but you don’t have to take its word for it. Every browser has a built-in list of everything a web page sends and receives, and a second test needs nothing more than switching off your Wi-Fi. Together they take five minutes and work with any editor that runs in a browser, including ours.Read the guide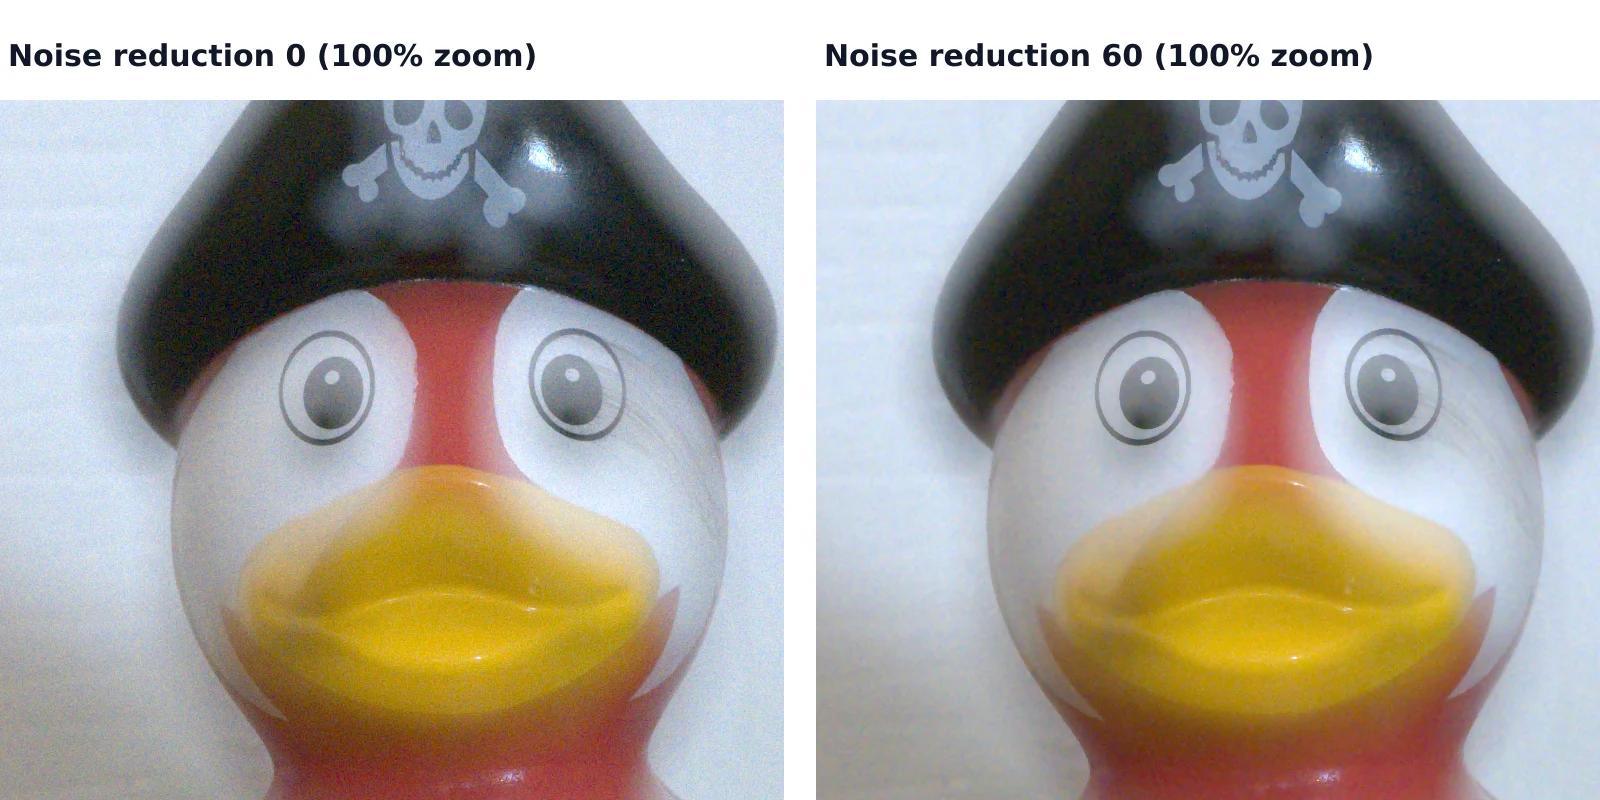 7 min read
How to reduce noise in a photo without AI
A photo taken indoors or at dusk often looks fine on the phone screen and grainy on a computer. That grain is noise, and you can reduce it without any AI tool or subscription, with filters that photo editors have used for years. They work well up to a point, and we measured that point on a real photo taken at ISO 6400.Read the guide