How to edit RAW photos for free, step by step
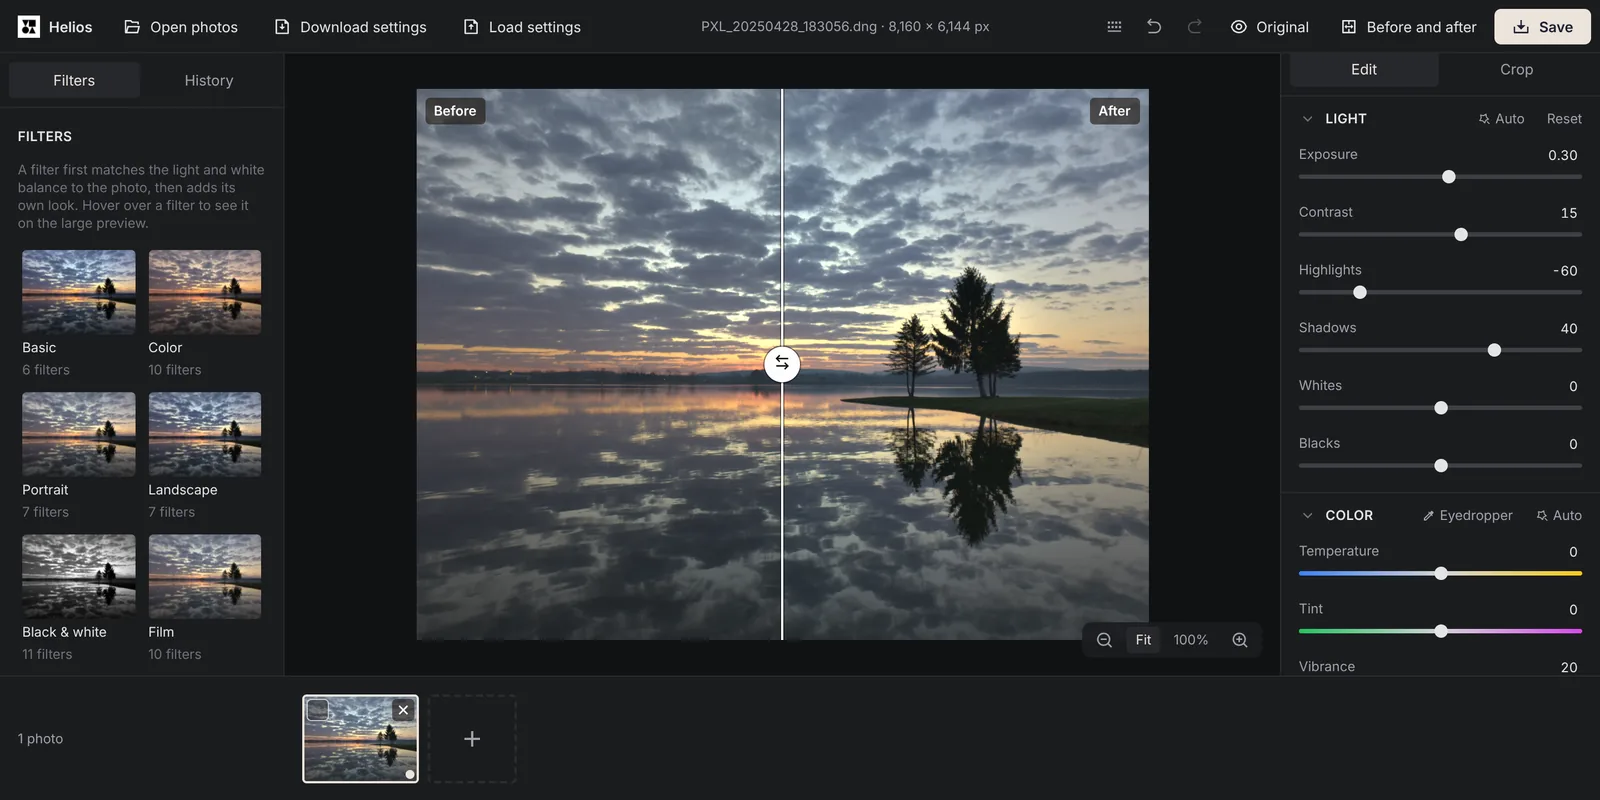
A RAW file lets you fix things that a JPG can’t: a sky that came out too bright, the wrong white balance or a face lost in shadow. You don’t need a paid program for it. This guide shows the order of edits that works for most RAW photos, using a free editor that runs in your browser.
What can you fix in a RAW file that you can’t fix in a JPG?
A RAW file keeps 12 or 14 bits per colour channel, which is 4,096 to 16,384 shades, while a JPG keeps 8 bits, which is 256 (Wikipedia). Those extra shades matter as soon as you start moving sliders:
- White balance. In a RAW file you can set any white balance after the shot, as if you’d chosen it on the camera (Wikipedia). In a JPG the camera has already applied its own white balance to the colours, so a strong correction often leaves skin and walls with an odd tint.
- Bright skies and windows. Areas that a normal development turns pure white often still hold detail in the raw data. Helios opens RAW files at 16 bits per channel and keeps that detail as extra headroom, so you can bring it back.
- Dark faces and shadows. When you brighten the shadows of a JPG, smooth gradients often show visible bands. With thousands of shades to spread out, a RAW file brightens more cleanly.
In what order should you edit a RAW photo?
| Step | Where in Helios | What to look for |
|---|---|---|
| 1. Overall brightness | Auto in the Light section, then Exposure | The photo should look neither dark nor washed out. Exposure brightens or darkens everything at once. |
| 2. White balance | Auto in the Color section, Eyedropper, Temperature and Tint | White and grey things should look neutral. The Eyedropper works best when you click something that is really white or grey, such as paper or a cloud. |
| 3. Bright and dark areas | Highlights and Shadows | The sky should keep its clouds, and faces in the shade should be visible. |
| 4. The brightest and darkest points | Whites and Blacks | After step 3 the photo can look grey. Whites and Blacks bring back a clear white and a deep black. |
| 5. Contrast and colour strength | Contrast, Vibrance and Saturation | Vibrance boosts muted colours more than strong ones and protects skin tones, so it’s the safer choice for portraits. |
| 6. Noise and sharpness | Noise reduction, then Sharpening in the Detail section | Judge both at 100% zoom (the Z key), because the scaled-down preview hides fine grain. |
| 7. Crop and straighten | The Crop tab | Cut off distracting edges and level a crooked horizon, or let Auto straighten do it. |
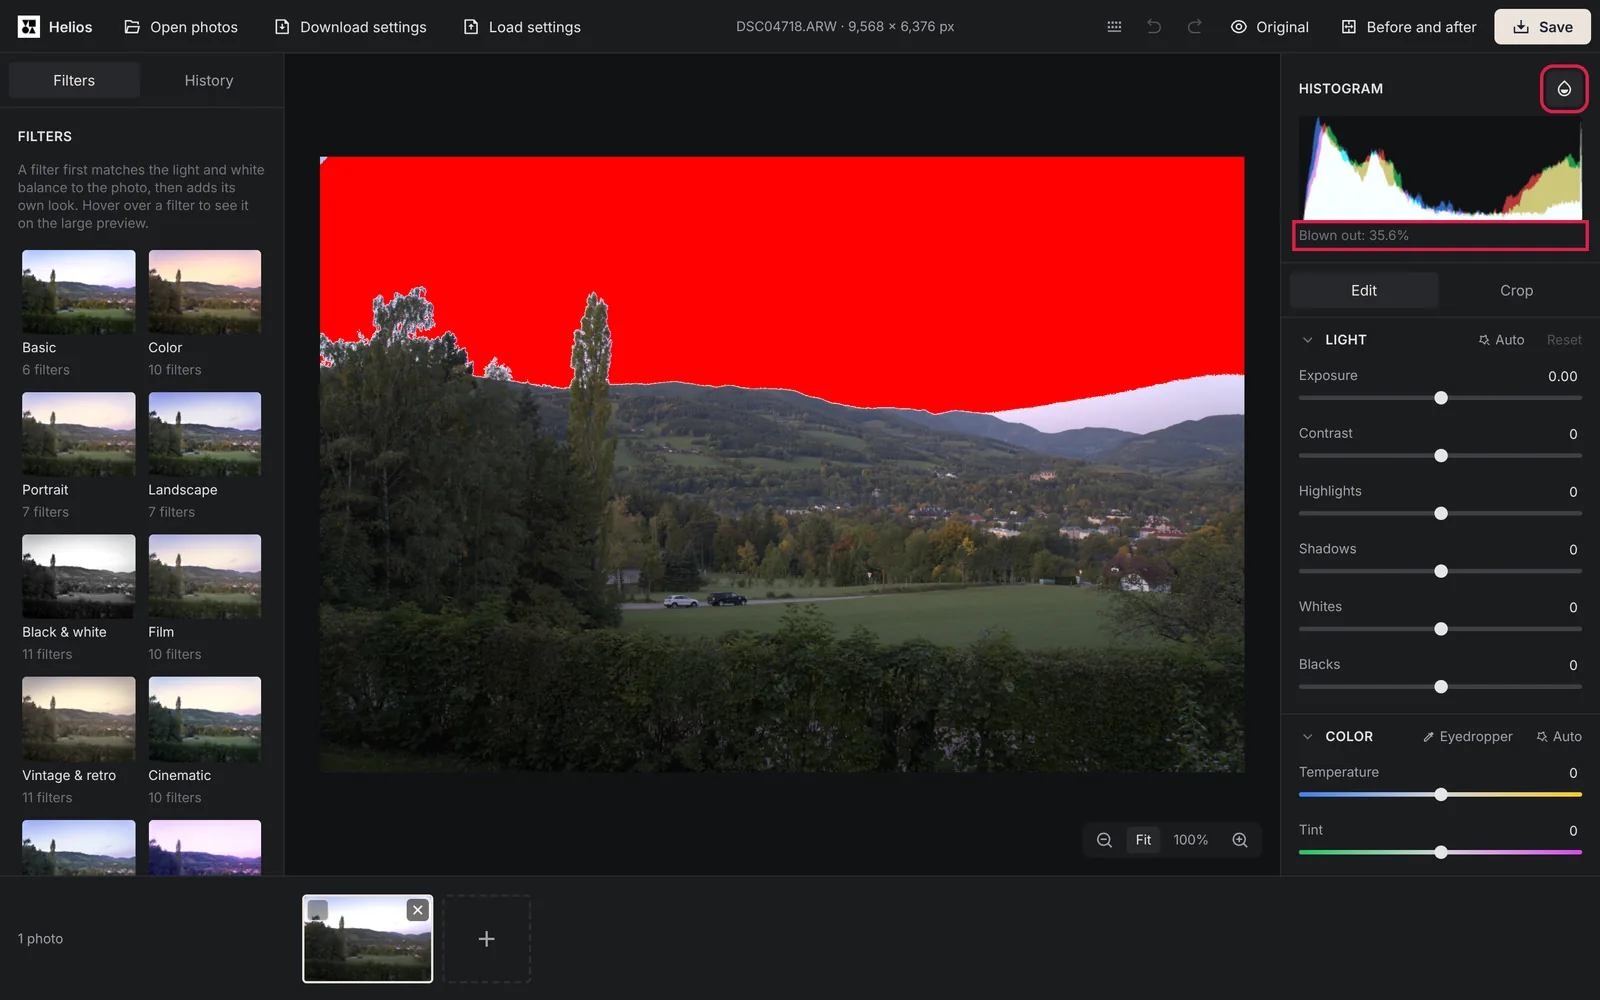
| 8. Final check | Before and after (Y key) and Show clipping (J key) | Compare the result with the original and check that no important area has turned red, which marks blown-out detail. |
How do you rescue a sky that came out too bright?
Start with the Show clipping button next to the Histogram label, or press J. Blown-out areas turn red and completely black ones turn blue, and the note under the histogram, for example Blown out: 2.4%, tells you how much of the photo has lost its detail.
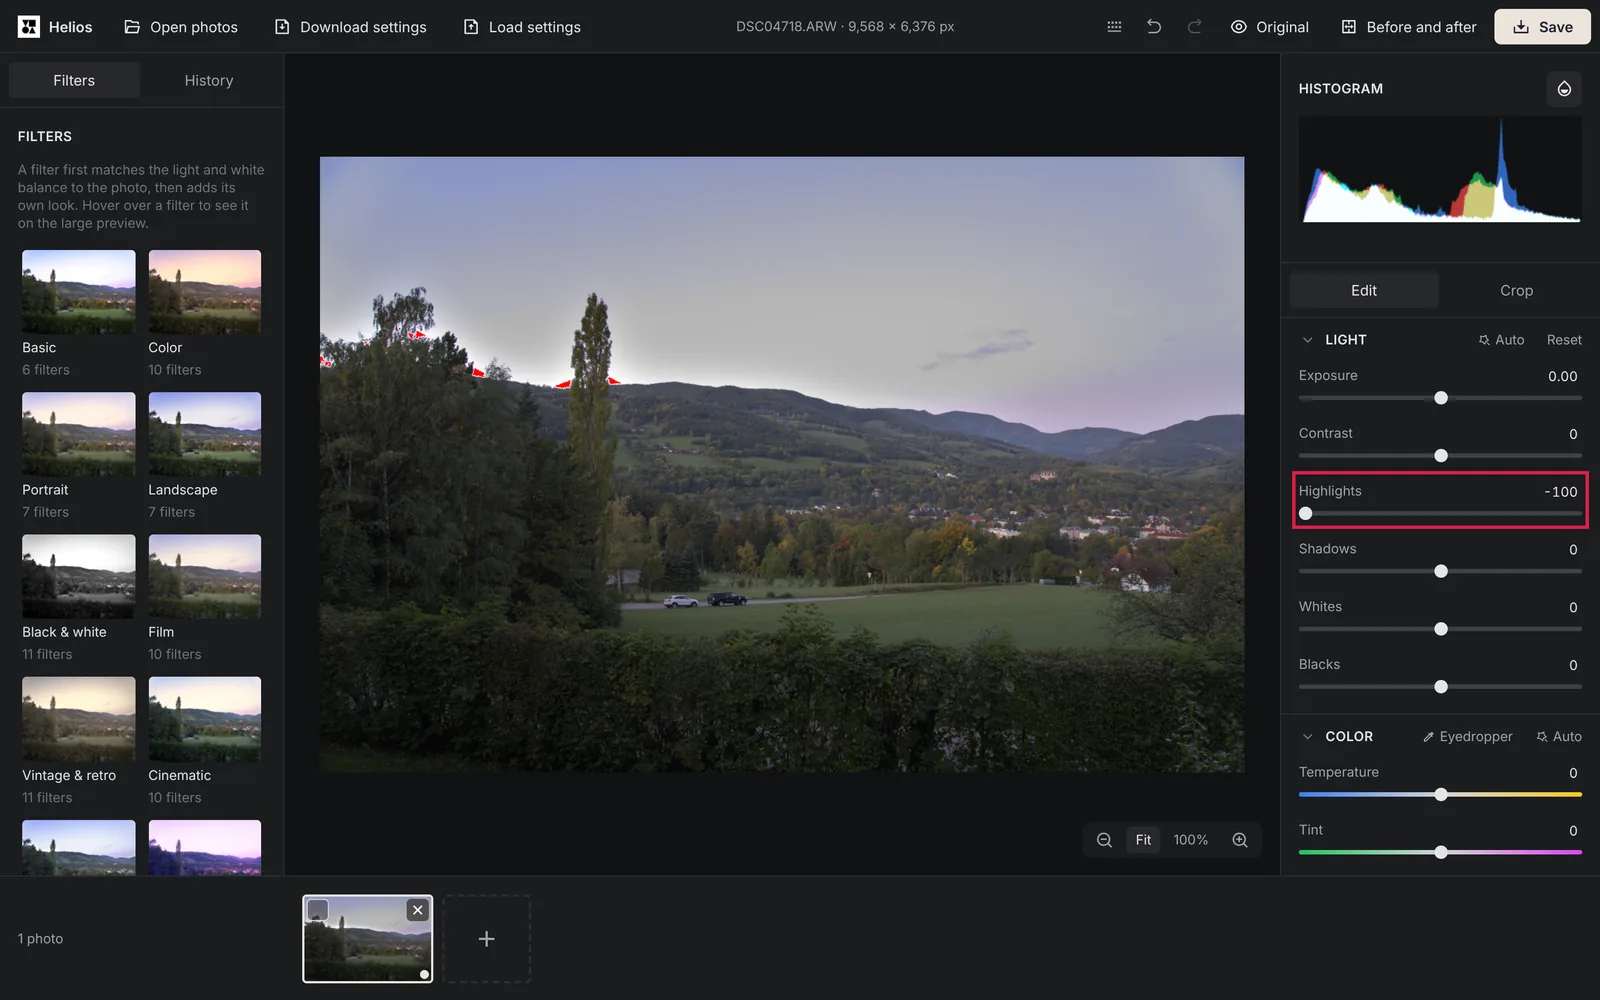
Then move Highlights to the left. In a RAW file the slider uses the headroom above white, so the clouds come back with their detail. If that isn’t enough, lower Whites a little, and only then reach for Exposure, because it darkens the whole photo along with the sky. When the red marks stay after all three, the sensor itself was overexposed in that spot. Helios can’t bring that detail back, but it removes the purple tinge that such areas often get.
How do you brighten a face in a photo taken against the light?
Move Shadows to the right. The slider only brightens the dark parts of the photo, so the face comes out of the shadow while the bright background stays as it was. Raising Exposure instead would brighten the background too and could blow it out. Our guide on how to fix a dark photo covers the other cases, such as a dim room or an evening shot.
Brightened shadows show more noise, especially in photos taken at high ISO or in the evening. Add some Noise reduction in the Detail section and check the face at 100% zoom: too much noise reduction also removes the texture of the skin, so stop as soon as the grain is no longer distracting.
Do RAW files from phones edit the same way?
Mostly, yes. Phones such as the Google Pixel and Samsung Galaxy save RAW photos as DNG, an open RAW format that Adobe published in 2004 (Wikipedia), and Helios opens them like files from a camera. The sliders and the order of edits stay the same.
RAW files from phones differ from camera files in two ways. Apple ProRAW on an iPhone is also a 12-bit DNG, but the phone has already demosaiced and partly processed it, and unlike a traditional RAW photo it works with Night mode (Wikipedia). And a DNG from a Pixel phone looks flatter and cooler in Helios than on the phone, because Helios doesn’t use the colour profile the phone saves in the file. Contrast, Vibrance and Temperature moved slightly to the right bring it close to what you saw when you took the photo.
How do you save the edited photo?
Click Save and choose what the photo is for: Full quality for printing and archiving, Website and email or Social media for sharing. A RAW file is saved as a JPG unless you pick another format, and the original RAW file stays unchanged. Our guide on converting RAW to JPG explains which settings keep the most detail.
You don’t have to finish in one sitting. Helios saves every change in your browser, and when you come back it offers to restore your work. Before you clear your browsing data, use Download settings to keep a copy of your edits in a file.
Sources
- Raw image format, Wikipedia
Frequently asked questions about editing RAW photos
Is it really free to edit RAW photos in Helios?
Yes. There’s no account, no trial period and no fee for saving. Ads appear in a separate column next to the editor, or in a narrow strip at the bottom on phones, and they never cover the photo or the buttons.
Can I edit RAW photos on an iPhone or iPad?
Yes. Helios works in Safari on iPhone and iPad, and the sliders work by touch. It also saves large photos at full resolution on those devices.
Should I edit RAW photos with filters?
You can. Helios has 100 filters, and each one first sets the light and white balance the same way as the Auto buttons and then adds its own look. The Filter strength slider weakens or strengthens the filter from 0 to 150%, and you can still fine-tune every slider afterwards.
More guides
 6 min read
Can you fix an overexposed photo? What RAW gets back and JPG doesn’t
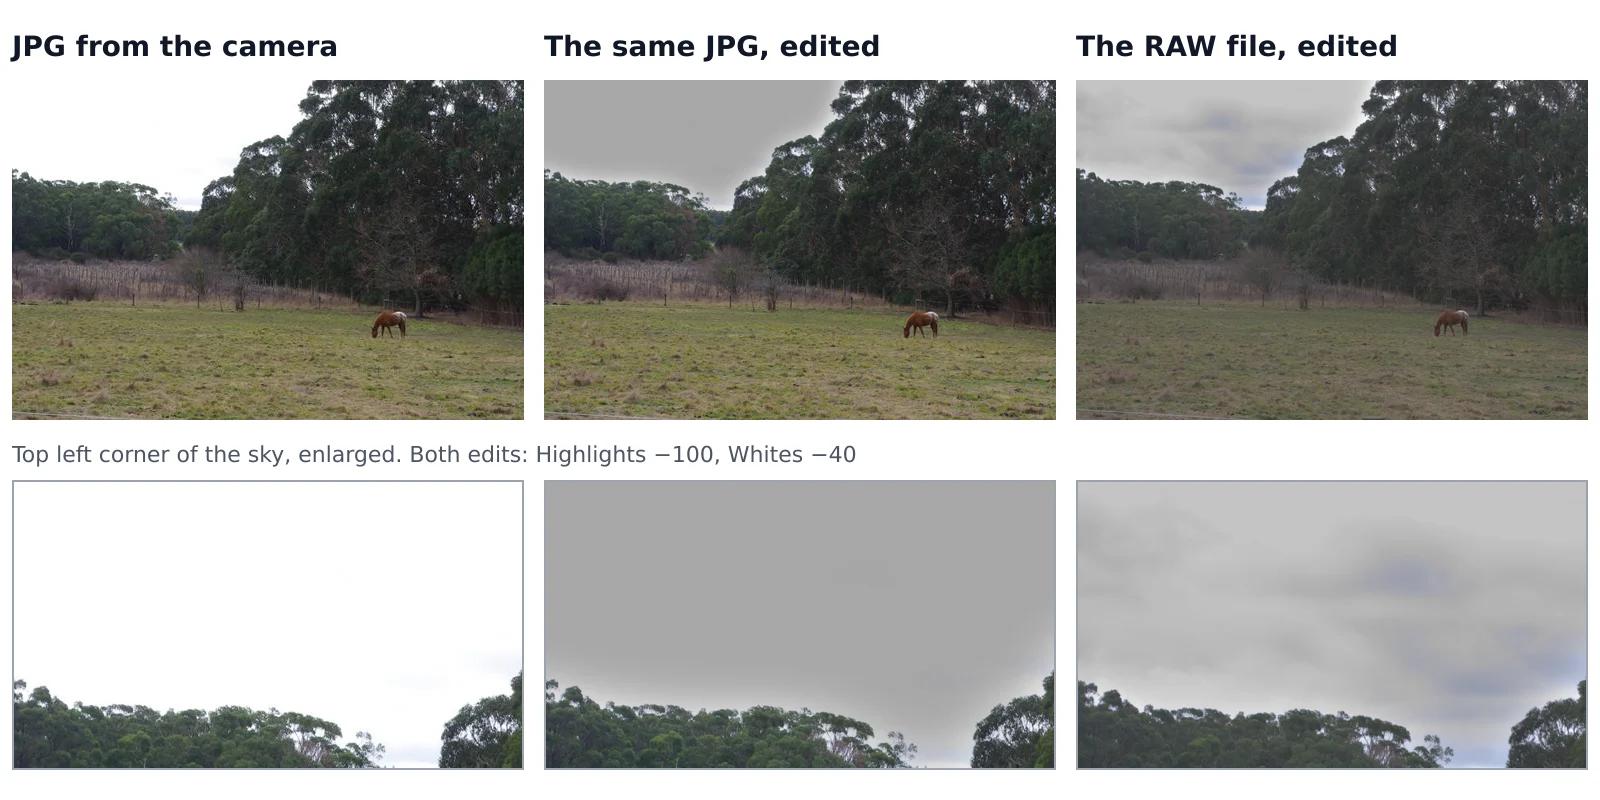
A sky that came out pure white looks the same whether you shot JPG or RAW, but it isn’t the same. In a JPG, the camera has already thrown away everything brighter than white. A RAW file often keeps some of it, and an editor can bring it back. We tested this on one shot that the camera saved both as a RAW file and as a JPG, with the same sliders on both.Read the guide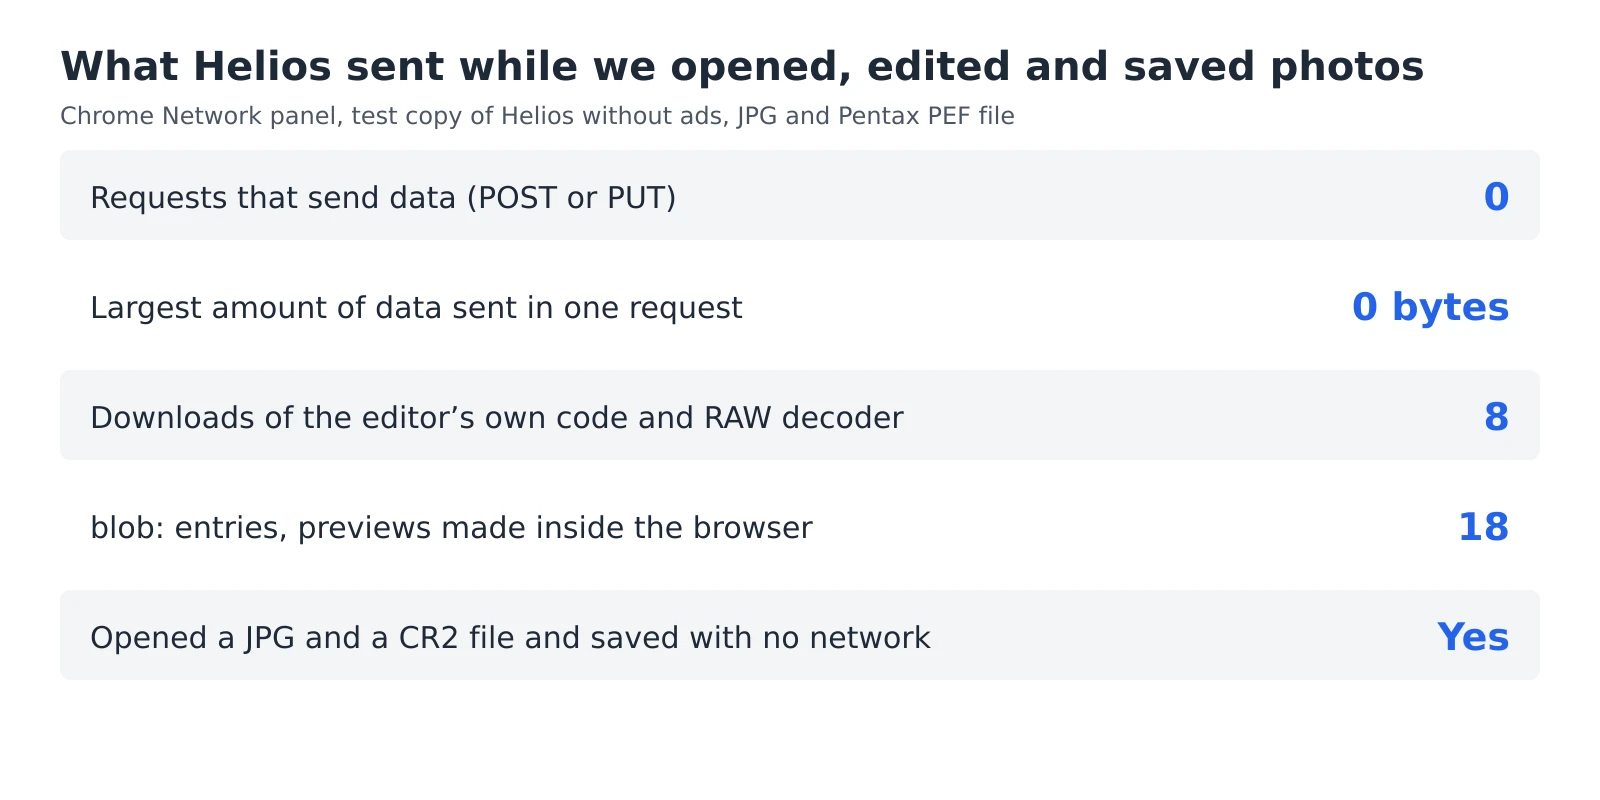 6 min read
How to check whether a photo editor uploads your photos
An editor can say that your photos stay private, but you don’t have to take its word for it. Every browser has a built-in list of everything a web page sends and receives, and a second test needs nothing more than switching off your Wi-Fi. Together they take five minutes and work with any editor that runs in a browser, including ours.Read the guide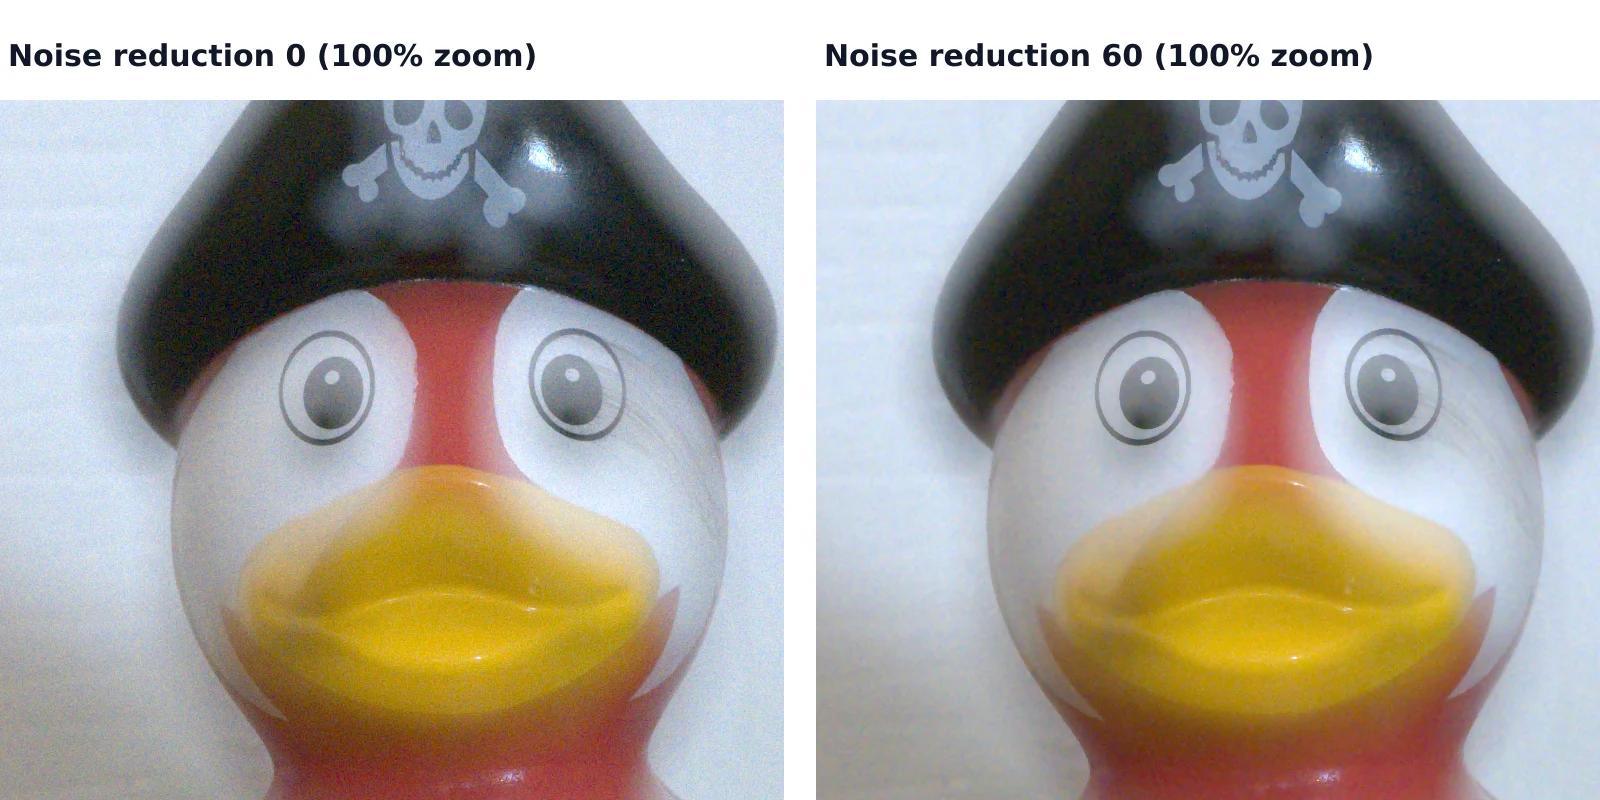 7 min read
How to reduce noise in a photo without AI
A photo taken indoors or at dusk often looks fine on the phone screen and grainy on a computer. That grain is noise, and you can reduce it without any AI tool or subscription, with filters that photo editors have used for years. They work well up to a point, and we measured that point on a real photo taken at ISO 6400.Read the guide